Ancient Emmer Pita Bread

introduction
When you bake ancient flatbread at home, you get a front row seat to the spectacle of time-lapse photography through the oven window. In the blink of an eye, the flat disk of dough that just left your hands basically levitates off the oven rack into a flying saucer of soft, lovely bread. Magic. In eastern Mediterranean cultures and beyond, this magic is called pita. Owing to its ease of preparation, its extraordinary flavor, and its unrivaled facility for conveying food to mouth, pita (and the many other forms of flatbread that dominate the region) enjoyed a smashing reputation since it was first baked on stones in an open fire. Historically, flatbread was made with emmer, an ancient grain with all the bona fides you’d expect from an ancient grain: feral and domestic populations of emmer can be traced to the Fertile Crescent since the dawn of civilization. Its name means “mother”—you can’t get more Ur than that. Like any excellent mother, emmer has extraordinary character and very good taste. But over the last century, bakers stopped using emmer in their flatbread formulas, to pita’s extreme detriment. Modern wheat just can’t compete—and it certainly cannot compete with Ancient Emmer Semolina and Pizza Maker’s Flour (Farina di Pizzaiolo ‘00’), the two flours we recruited for this recipe. Together these flours, put to work in a very minimalist recipe befitting the flatbread heritage, managed to produce pita that possesses the soft and supple texture of a summer-weight down comforter and enough fresh, spicy floral ancient emmer flavor to make anyone swoon.
Baking Notes
The way this dough is rolled out has serious impact on how well it puffs. Roll it evenly on one side only from the center out to the edges without flipping the disk of dough. Try to avoid wrinkles and crinkles. If the dough is too thinly rolled, the crumb will be diminished. Baking goes quickly. Bake the disk until it puffs, then flip it over. It sets quickly on the second side. Don’t expect to see much, if any, browning.
equipment mise en place
For this recipe, you will need a digital kitchen scale, a medium and a large mixing bowl, a wooden spoon, a plastic dough scraper, a pizza stone, a metal bench knife, a ruler, a rolling pin, two clean fabric potholders, a metal spatula, a plate, and a clean kitchen towel (one that does not smell of fabric softener!).
-
for the poolish:
-
7
-
½teaspoon instant yeast
-
7ounces spring or filtered water, warm (about 100 degrees)
-
-
for the dough:
-
1teaspoon instant yeast
-
1½teaspoons fine sea salt
-
3.2ounces spring or filtered water, warm (about 100 degrees)
-
6ounces Anson Mills Pizza Maker’s Flour (Farina di Pizzaiolo ‘00’), plus additional for shaping the dough
-
3
-
-
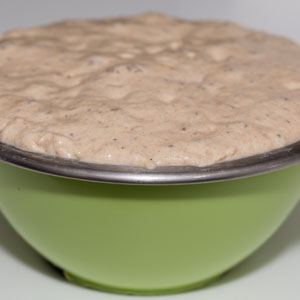
Make the poolish: Place the flour, yeast, and water in a medium mixing bowl and stir with a wooden spoon until the ingredients come together to form a wet, batter-like dough, about 1 minute. Cover with plastic wrap and let the poolish rise at room temperature until bubbly and active, at least 4 hours, or for up to 6 hours (fig. 1.1).
-
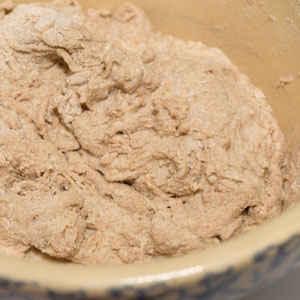
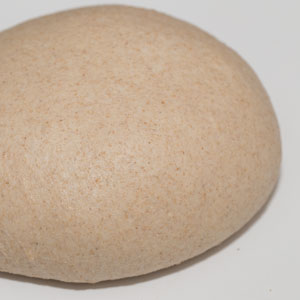
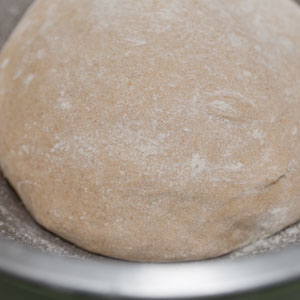
Make the dough: (If your poolish spent the night in the fridge, stir it down and allow it to stand for a couple of hours until the chill falls off before proceeding.) Stir down the poolish with a wooden spoon. Add the yeast, salt, water, flour, and semolina. With a cupped hand acting as a spatula or a wooden spoon, stir to combine the ingredients until a scraggly dough forms (fig. 2.1). Turn the dough onto a clean work surface and knead it rhythmically without adding additional flour until it becomes smooth, satiny, and extensible (fig. 2.2), 20 to 25 minutes. The dough will feel tacky at first, but will gradually become smoother under your hands. Toss a tablespoon or two of pizza flour into a large, clean bowl, turn the dough into it, and roll the dough around. Cover the bowl tightly with plastic wrap and let rise at room temperature until nearly doubled in size and a floured thumbprint leaves an indentation, about 1 hour (fig. 2.3).
-
Adjust a rack to the lowest position, allowing plenty of clearance above, and place a baking stone on it. Heat the oven to 500 degrees.
-
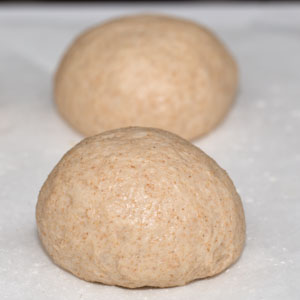
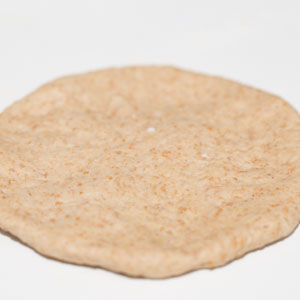
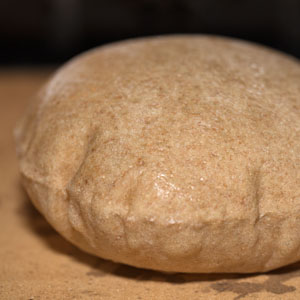
Scrape the dough out of the bowl onto the work surface. Using a metal bench knife, portion the dough into fourteen 2-ounce pieces of dough. Using your hands, roll each piece into a ball on the work surface, allowing dough’s tackiness to help form, a neat, taut shape (fig. 4.1). Don’t add additional flour. Cover the balls with a piece of plastic wrap. Dip your fingers in flour and stretch a single ball into a round about 4-inches in diameter. Lightly sprinkle the work surface with flour, set the round on top, and lightly sprinkle the round with flour. Using a rolling pin, roll it from the center out to the edges, without flipping it over, to a 5½-inch round (fig. 4.2). Take care to avoid wrinkling and curling over the dough. Gently transfer the round to a clean fabric potholder. Open the oven door and, with the dough-bearing potholder on the palm of your hand held not far above the hot baking stone, quickly flip the round onto the hot stone. Close the oven door and roll out another piece of dough while the first one bakes. Bake the round until it puffs dramatically, 40 to 60 seconds (fig. 4.3), leave it on the stone for a few seconds more, and then flip it over with a metal spatula. If it does not puff on the first side, flip it anyway. (Even if the dough puffs only slightly or unevenly, the bread will still be delicious.) Continue to bake until just set on the second side, about 30 seconds.
-
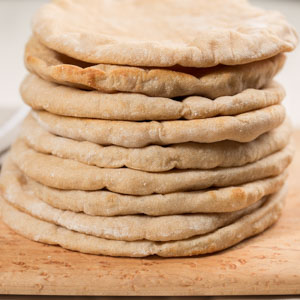
Using the metal spatula, transfer the baked pita to a plate and cover it with a clean kitchen towel. Bake the second round the same way as the first, and repeat the process of rolling and baking the remaining dough balls. Place the baked pita on top of each other to stay moist (fig. 5.1). Don’t get more than two potholders’ worth of rolled dough in front of what’s progressing in the oven. (This all sounds trickier than it actually is.)
-
Serve the pita the day they’re made with a dip, as a salad accompaniment, as a nesting place for kebabs or fried falafel, or as pocket bread for a sandwich. Store uneaten pita in the refrigerator tightly wrapped for up to 3 days. Days-old pita is terrific toasted, tossed on the grill, or baked into chips.
-
-
1.1
-
-
-
2.1
-
2.2
-
2.3
-
-
-
4.1
-
4.2
-
4.3
-
-
-
5.1
-