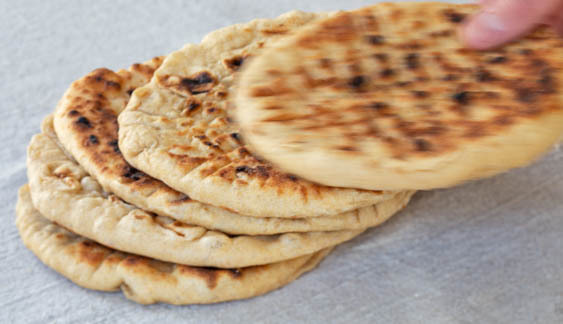
Grilled Semolina Flatbreads
introduction
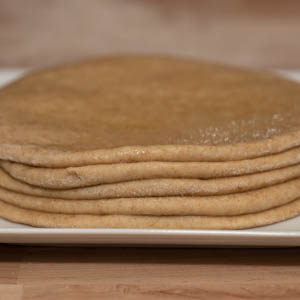
This quick-to-throw-together, quick-to-rise, easy-to-grill flatbread, inspired by Moroccan chef Mourad Lahlou, is unlike any we’ve had. Similar to naan in form and function, the formula contains no dairy but features a generous amount of olive oil and a couple of eggs, making the finished bread light and soft.
To preferment our foundation Anson Mills flours and begin with a headier flavor base, we moved the dough off straight yeast leavening to a liquid-y, responsive poolish. Ancient flatbreads were traditionally made with flinty emmer and durum wheats, which, when finely milled, produced “flour” with the texture of desert sand. We chose our soft Ancient Emmer Semolina to lend the bread a pleasant grassiness and balance its rich additions. And for strength and extensibility—crucial to manipulating the dough and rolling it thin—we sought assistance from our most reliable bread flour in the stable, French Mediterranean White Bread Flour.
If you’re looking to impress guests with truly fresh bread, this is the perfect recipe. Charred over a live fire yet pillowy-tender, you’ll want to swipe these little disks through whatever sauce sits at your elbow, old world or new.
Baking Notes
Follow our timeline and you’ll have fresh flatbreads for a late lunch, but you can start the process earlier or later, as your schedule permits. Or you can make a couple simple modifications to the poolish to shorten its fermentation from 12 hours to about 4 hours so that the breads can be made start to finish in a single day. Here’s how: double the yeast to ⅛ teaspoon and warm the water to 100 degrees instead of 90 degrees. The resting time for the autolyse and the fermentation time for the dough remain the same.
These flatbreads really come alive when grilled over charcoal, catching a smokiness that makes them taste ancient and authentic. But if you prefer, or must, cook the flatbreads indoors, use a 10-inch well-seasoned cast-iron grill pan on the stove top. After you divide the dough but before you final-shape the pieces, set the grill pan over medium-low heat and let it warm while you roll out the disks. Just before you place the first round into the pan to cook, turn up the heat to medium-high. The cooking time is the same as if grilling over a live fire.
Once fully cooled, the flatbreads can be stacked, wrapped in plastic, and stored overnight at room temperature. Before serving the next day, warm them in a 350-degree oven for 1 to 2 minutes, laying the breads directly on the oven rack(s). Or, to freeze them for up to 1 week, wrapped the breads tightly in plastic and seal them in a zipper-lock bag. To serve, bring to room temperature, then rewarm as described just above.
equipment mise en place
For this recipe, you will need a digital kitchen scale; a small saucepan; a digital instant-read thermometer; a small bowl; a stand mixer with a dough hook attachment; a plastic bowl scraper; a medium bowl (heavy ceramic is ideal); a metal bench knife; a pair of long-handled tongs; a chimney starter and a charcoal grill or a gas grill; a grill brush; two plates at least 6 inches in diameter; a pastry brush; a rolling pin; a ruler; and a wire rack.
-
for the poolish:
-
45grams Anson Mills French Mediterranean White Bread Flour, freezer-cold
-
45
-
90grams spring or filtered water
-
1/16teaspoon instant yeast
-
-
for the autolyse:
-
125grams spring or filtered water
-
Poolish
-
2grams instant yeast
-
115grams beaten cold eggs
-
55grams extra-virgin olive oil
-
15grams honey
-
370grams Anson Mills French Mediterranean White Bread Flour, room temperature
-
100grams Anson Mills Ancient Emmer Semolina, room temperature
-
-
for the final dough:
-
Autolyse
-
10grams fine sea salt
-
Extra-virgin olive oil, for greasing the bowl
-
-
for final shaping:
-
Anson Mills French Mediterranean White Bread Flour, for dusting
-
Extra-virgin olive oil
-
-
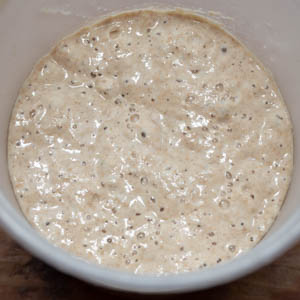
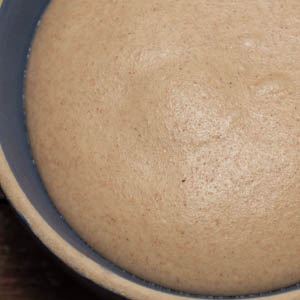
Day 1, 10:00 p.m.— mix the poolish: In a small saucepan, warm the water to 90 degrees. Pour it into a small bowl, then add the yeast and flour. Stir until the mixture resembles a smooth batter. Cover tightly with plastic wrap and place in an area where it will maintain an internal temperature of 65 to 70 degrees. Leave the poolish to ferment for 12 hours (fig 1.1).
-
Day 2, 10:00 a.m.— mix the autolyse: In a small saucepan, warm the water to 90 degrees. Pour it into the bowl of your stand mixer, then add the poolish, the yeast, eggs, olive oil, and honey; squeeze and stir with your hand until the mixture is homogenous. Add the bread flour and semolina and incorporate by squeezing and kneading with your dominant hand while rotating the bowl until the mixture is cohesive but still quite shaggy (fig. 2.1). Occasionally scrape the bowl and your hand with a plastic bowl scraper. Cover with plastic wrap, place in a warm area, and let rest for 15 minutes.
-
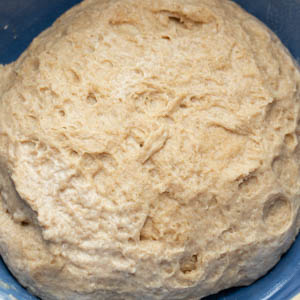
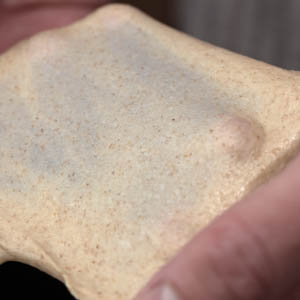
Day 2, 10:15 a.m. — mix the final dough and allow it to ferment: Add the salt to the autolyse. Lock the bowl into the stand mixer, attach the dough hook, and mix on medium speed for 4 to 5 minutes. Now check the gluten development by breaking off a 2-inch piece and, holding it aloft with both your hands, gradually and gently stretch it to a thin membrane. If the dough is adequately kneaded, it will stretch until translucent (fig. 3.1), and when it tears, it should do so cleanly. If you cannot achieve a thin membrane, knead the dough on medium speed for an additional minute or two and test it again. Lightly oil a medium bowl (heavy ceramic is ideal) with olive oil, then transfer the dough to the bowl. Cover tightly with plastic wrap and place in a warm area, one where the dough will maintain an internal temperature of 74 to 76 degrees. Allow the dough to ferment until doubled in size (fig. 3.2), about 2 hours.
-
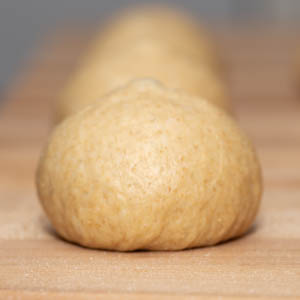
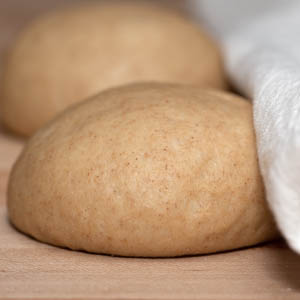
Day 2, 12:30 p.m. – divide and pre-shape the dough: Lightly dust the dough and an area of your work surface with flour. Using a plastic bowl scraper, scrape the dough out onto the floured area, then lightly dust the surface of the dough with flour; use only as much as needed so it won’t stick to your hands as you handle it. Pat the dough into a rough rectangle of even thickness and pop any large bubbles. Use a metal bench scraper to divide it into 10 evenly sized pieces, each weighing about 95 grams. With the palm of your hand, lightly roll each piece against the work surface into a ball; aim for a taut surface and sealed bottom (fig. 5.1). Set the dough balls on an unfloured area of your work surface, spaced at least 1 inch apart, then cover loosely with plastic wrap or a clean kitchen towel. Let rest for at least 30 minutes or up to 1 hour (fig. 4.1).
-
Meanwhile, prepare a charcoal or gas grill: If you’re using a charcoal grill, ignite a large chimney’s worth of charcoal and let it burn until white-hot and ashed over. Dump the coals into the grill, then use a pair of long-handled tongs to arrange the coals into an even layer covering only one half of the grill. Position the cooking grate on the grill, cover, and heat for about 5 minutes; using a grill brush, scrub the grate clean. If you’re using a gas grill, turn all burners to medium-high, cover the grill, and let the grill heat for about 10 minutes; using a grill brush, scrub the grate clean.
-
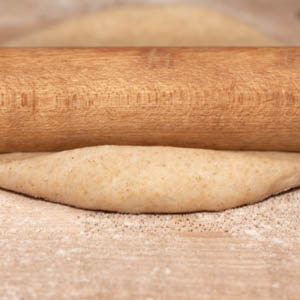
Final shape the dough: Lightly brush two plates at least 6 inches in diameter with olive oil. Dust another area of your work surface with flour. Using a metal bench knife, gently scrape up one dough ball and place it on the floured surface; keep the remaining pieces covered. Dust the dough with flour. Press the mid-section of a rolling pin into the center of the dough, then roll away from you (fig. 6.1). Reposition the pin at the center of the dough, then roll toward yourself; the dough should now be oval in shape. Rotate the dough 90 degrees and roll out in the same manner. Continue rolling and rotating until the dough is about 6 inches in diameter and about ¼ inch thick, dusting with only as much flour as needed to prevent sticking. Transfer the dough disk to one of the prepared plates, then lightly brush the surface of the dough with olive oil. Repeat with the remaining dough balls, stacking five disks per plate (fig. 6.2).
-
Grill the breads: Gently lift one disk of dough and place it on the hot side of the grill. Cook undisturbed for about 15 seconds, then gently rotate the disk 45 degrees to achieve nice crosshatched grill marks. Cook for another 15 seconds until the surface of the dough begins to bubble and blister (fig. 7.1). Using the tongs, flip the disk (fig. 7.2), still on the hot side of the grill, and continue to cook undisturbed until the bubbles on the second side are deeply charred, about 30 seconds longer. Transfer the flatbread to a wire rack. Cook the remaining dough disks in the same way, doing two at a time once you’ve got the hang of the process; shingle the breads on the rack as they’re done so they don’t steam and turn soggy. Serve warm.
-
-
1.1
-
-
-
2.1
-
-
-
3.1
-
3.2
-
-
-
4.1
-
4.2
-
-
-
6.1
-
6.2
-
-
-
7.1

-
7.2

-