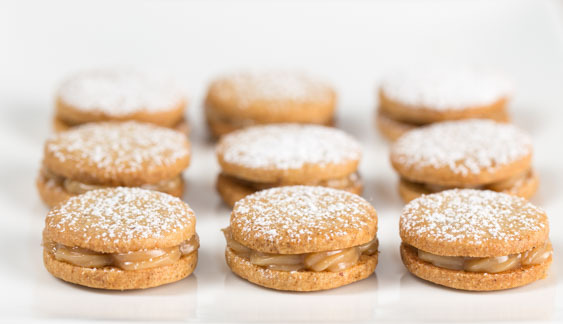
Toasted-Oat Alfajores
introduction
Alfajores, pale sandwich cookies with a milky caramel filling, rose from the mists of ancient Spain and eventually swarmed every culture in South and Central America. Associated most frequently today with Argentina, alfajores carry the weight of their expansive history in the form of myriad permutations ranging from the simple blond cornstarch cookie with dulce de leche filling to the manically complex spicy chile praline-flecked marshmallow and toasted coconut variant. They seek bedazzling from a gentle sift of powdered sugar all the way to vivid color coatings made of tinted sugars. Chocolate has been known to make an appearance. The diversity options are blinding.
We leafed through the Americas for our dream alfajores and found the traditions of Nicaragua and Costa Rica most compelling. It is there, where even horchata is made with oats, that the notion of oat alfajores caught our attention. Unlike traditional cornstarch alfajores, which, though tender, bring little if any flavor to the equation, Anson Mills oat flour gave these cookies real flavor dimension. The little oat flour shortbreads Dawn developed for this recipe are also magical all on their own—very lightly sweetened, they could be served simply with cheese.
But let’s face it: the big draw of alfajores is their dulce de leche filling. This hypnotically light caramel is made by reducing milk and sugar down, down, down until the sugar and milk solids have taken on a butterscotch hue and coat the spoon like pudding. We chose to make ours from scratch rather than taking the shortcut of boiling a can of sweetened condensed milk in a pot of water. No small effort went into making this happen (turns out there is a reason people boil the can), but Dawn nailed it in the end. The filling is killer. Surrounded on two sides by oat wafer crispness, our alfajores define the urge to take the next bite.
Baking Notes
Making dulce de leche from scratch means subjecting the milk and sugar to a lengthy cooking process to reduce the total volume by more than 75 percent. So it’s no surprise that what kind of milk you use matters. This recipe requests the use of pasteurized milk, as opposed to the more frequently encountered ultrapasteurized milk. And in case you have a penchant for cream-on-top milk, this recipe also prefers fat-integrated homogenized milk. Be prepared to look carefully at carton labels at the grocery store.
That’s not all. Dulce de leche also suffers inattention poorly. During the first half of the cooking process, it tries to boil over; during the second half, it may try to scorch. When the caramel begins to reveal its color, it’s time to quit whatever else you’re doing and really stand on top of this stuff, whisking and stirring with a silicone spatula until the proper consistency has been achieved.
equipment mise en place
To make the dulce de leche, you will need a digital kitchen scale, a 5- to 5½-quart heavy-bottomed saucepan or Dutch oven (preferably enameled cast iron, such as Le Creuset or Staub), a silicone spatula, a whisk, and a container or jar for storage. If your dulce de leche requires straining, you will also need a large fine-mesh strainer, a small ladle, and a 2- or 4-cup heatproof liquid measuring cup.
To make, bake, and fill the cookies, you will need a digital kitchen scale, a medium and a small bowl, a stand mixer fitted with the flat-beater attachment, a rubber spatula, two baking sheets, parchment paper, a rolling pin, a plastic dough scraper or bench knife, a ruler, a 1¼- or 2-inch plain or fluted round cookie cutter, wire cooling racks, a pastry bag with a very small star tip, and a small fine-mesh or tea strainer.
-
for the dulce de leche:
-
6cups pasteurized (not ultrapasteurized), homogenized whole milk (see Baking Notes)
-
13ounces (1¾ cups plus 2 tablespoons) granulated sugar
-
1.25ounces (2 tablespoons) light corn syrup
-
¼teaspoon baking soda
-
Pinch of fine sea salt
-
½teaspoon vanilla extract
-
-
for the cookies:
-
6.75ounces (1½ cups plus 1½ tablespoons) Anson Mills Colonial Style Fine Cloth-Bolted Pastry Flour, plus additional for dusting
-
4.5ounces (1 cup plus 1 rounded tablespoon) Anson Mills 18th Century Style Rustic Toasted Oat Flour
-
¾teaspoon baking powder
-
7ounces (14 tablespoons) unsalted European-style butter, room temperature
-
2.75ounces (⅓ cup plus 1 tablespoon) granulated sugar
-
½teaspoon fine sea salt
-
1large egg, plus an additional egg if needed
-
1teaspoon vanilla extract
-
Confectioners’ sugar for dusting
-
-
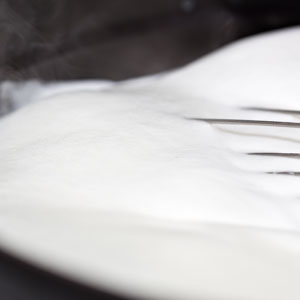
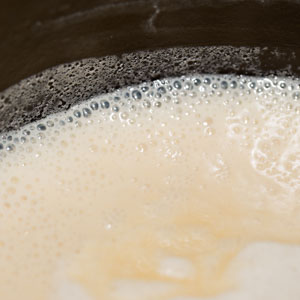
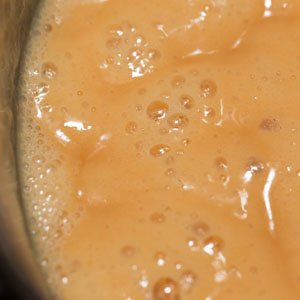
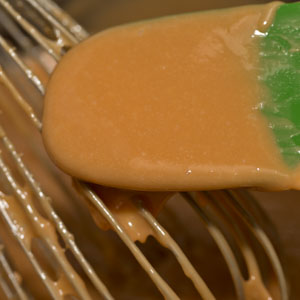
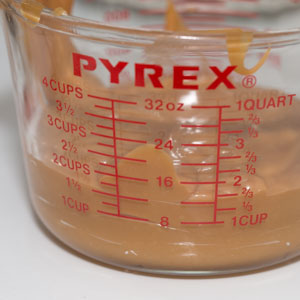
Make the dulce de leche: In a 5- to 5 ½-quart heavy-bottomed saucepan or Dutch oven (preferably enameled cast iron), combine the milk, sugar, corn syrup, baking soda, and salt. Set the pan over medium-high heat and bring to a simmer, stirring with a silicone spatula during the first couple of minutes to dissolve the sugar. As the milk gathers heat, watch closely to make sure it doesn’t froth over—swirling a whisk lightly through the foam will calm it down (fig. 1.1)—and let it simmer energetically. As the liquid simmers, some of the foam will cling to the sides of the pan; use a rubber spatula to scrape and stir this foam into the milk before it dries on the sides of the saucepan. When the mixture is beige in color and has thickened slightly—30 to 50 minutes of simmering, depending on the heat output your stove—begin to stir more frequently, making sure to scrape along the bottom of the pot, and continue to simmer (fig. 1.2). The liquid will continue to darken in color and, as it nears the finish line—that is, when it becomes glossy and frothy and releases only a small amount of steam (fig. 1.3), begin to stir and whisk more frequently. The dulce de leche is ready when it has a butterscotch color, resembles warm pudding in consistency, and falls from the spatula in small globs, about 1½ hours total (fig. 1.4). You should have 1½ cups (fig. 1.5). If darker (in other words, scorched) bits have strayed into the dulce, you will have to strain it. Set a large fine-mesh strainer over a 2- or 4-cup heatproof liquid measuring cup and immediately pour the dulce de leche into the strainer. Using a small ladle, pump the mixture through the strainer, and then scrape the underside of the strainer with a rubber spatula to collect all of dulce. Stir in the vanilla.
-
Transfer the dulce de leche to a container or jar and let cool to room temperature. Once cooled, press a small piece of plastic wrap directly against the surface of the dulce de leche to prevent it from drying out. Cover tightly and refrigerate until well chilled, at least 2 hours or for up to 2 weeks. (The dulce de leche will thicken as it chills.)
-
Make the cookie dough: In a medium bowl, whisk together the pastry flour, oat flour, and baking powder. Place a small bowl on a digital kitchen scale set, tare the scale, and crack the egg into the bowl. The egg should weigh 1.75 ounces. If it weighs too little, beat a second egg in a separate bowl and make up the difference; if it weighs too much, whisk the egg with a fork and pour off the excess. Add the vanilla to the egg and beat with a fork to combine.
-
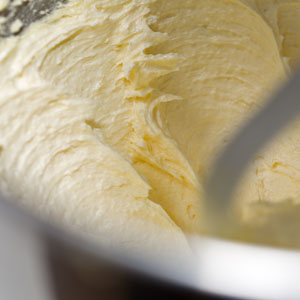
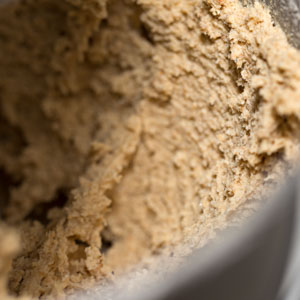
In the bowl of a stand mixer fitter with the flat-beater attachment, beat the butter, sugar, and salt on medium-high speed until light and fluffy, about 3 minutes (fig. 4.1). Scrape down the bowl with a rubber spatula. Add the egg and vanilla mixture and beat on medium-high speed until well combined, about 1 minute. Scrape down the bowl. Add the flour mixture and mix on low speed until fully incorporated, about 1 minute (fig. 4.2). Scrape the bowl once more to ensure that there are no dry pockets or streaks of butter.
-
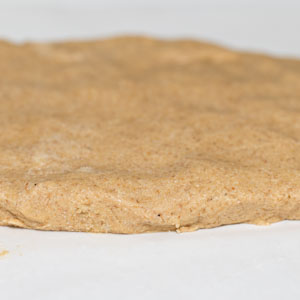
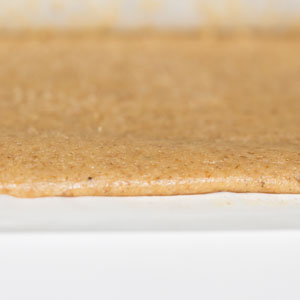
Cut two sheets of parchment paper about 18 inches long. Turn the dough out onto a clean work surface and knead it gently just until it comes together into a cohesive mass. Set the dough on the parchment and pat it into an 8- by 6-inch rectangle (fig. 5.1). Lay the second sheet of parchment on top. Using a rolling pin, roll out the dough to a 15- by 11-inch rectangle. If some of the dough goes outside the parchment, trim it with a plastic dough scraper or bench knife, patch it back into the mass, and continue rolling. Use the dough scraper to level any thicker areas dough by applying light pressure and sweeping toward the edges (fig. 5.2). The dough rectangle should be of an even 3/16- to ¼-inch thickness, no thinner and no thicker (fig. 5.3). Slide the parchment onto a baking sheet and refrigerate for at least 30 minutes or for up to 2 days.
-
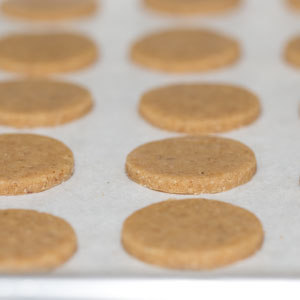
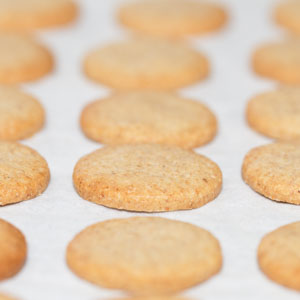
Adjust the oven rack to the middle position and heat the oven to 350 degrees. Line two baking sheets with parchment paper. Remove the dough from the refrigerator and lay the parchment-sandwiched dough on the work surface. Peel off the top sheet of parchment, lay it back in place, and flip the entire package. Peel off the second sheet of parchment. Using a 1¼- or 2-inch plain or fluted round cookie cutter, stamp out as many rounds of dough as possible (fig. 6.1) and place the rounds on the prepared baking sheets, spacing them evenly apart (the cookies won’t spread much during baking). You can gather and reroll the scraps until you’ve used up as much of the dough as possible. Bake the cookies one baking sheet at a time until golden brown at the edges and a few shades lighter at the centers (fig. 6.2), 10 minutes for 1¼-inch rounds or about 15 minutes for 2-inch rounds, rotating the baking sheet halfway through. Let cool completely on the baking sheets on wire racks.
-
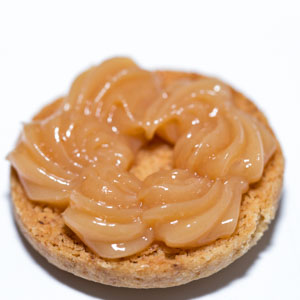
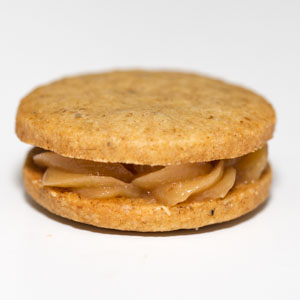
To fill and finish the cookies, turn half of them bottom side up. Fit a pastry bag with a tiny star tip and load it with the dulce de leche. Pipe filling around the circumference of the overturned cookies (fig. 7.1). Alternatively, use a spoon to mound dulce de leche onto the center of each overturned cookie (use about a scant teaspoon for 1-inch cookies and a generous teaspoon for 2-inch cookies). Place a second cookie on top and press the two together gently, pushing the filling out to the edges (fig. 7.2).
-
Arrange the filled cookies close together in a single layer on one of the baking sheets. Put a spoonful or two of confectioners’ sugar into a small fine-mesh or tea strainer and dust the tops of the cookies with a light, even coating. Serve the alfajores right away. (The cookies will keep in an airtight container in the refrigerator for up to 3 days. If needed, give them another light dusting of confectioners’ sugar to refresh their appearance and let them stand at room temperature for 10 to 15 minutes before serving.)
-
-
1.1
-
1.2
-
1.3
-
1.4
-
1.5
-
-
-
4.1
-
4.2
-
-
-
5.1
-
5.2

-
5.3
-
-
-
6.1
-
6.2
-
-
-
7.1
-
7.2
-