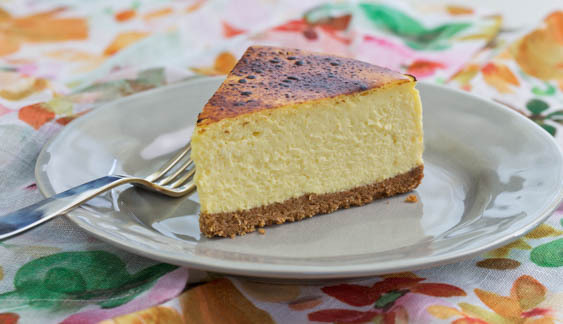
Lemon Cheesecake
introduction
Among the handful of naughty enticements we avoid at all costs, cheesecake is one such guaranteed guilt-trip, sure to produce, at the very least, a mild outbreak of hand-wringing in its aftermath. Yet persuading our graham flour to participate in a plan that compelled us to consume large quantities of a forbidden food out of duty and slip from the cycle of hand wringing for a time took no effort at all. So here we are, finally, with this really fantastic cheesecake and a few pounds in the plus column. We took one for the team.
First, a few words about the crust. We have a graham cracker recipe on our website. We also offer a splendid graham pâte sucrée intended for chocolate and banana cream pies. But we wanted to get a full-blown traditional graham crust up, too, one with ground graham crackers, butter, and sugar. We knew our graham flour would outshine and outperform any other in cracker form, whether store-bought or homemade. This crust, fabricated with but one minor modification from our existing graham pâte sucrée recipe, required little course correction in the process of its development—it practically made itself. It is an iconic graham crust with an open, almost honeycomb texture, a crunch that comes from its crisp bran and milling properties rather than time spent in the oven, and a no-holds-barred graham flavor. We made the crust nice and thick—you wouldn't want any less of it, that’s for sure.
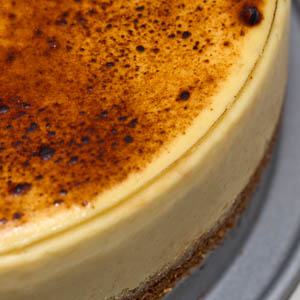
Atop (a preposition one editor warned us never to use) this crust rests a magnificent baked cheese filling. When it comes to cheesecake fillings, there are some that tremble delicately in their water baths and others that swagger around with “I winter in Miami” tans. Which one sounds like a New York–style cheesecake?
It wasn’t the swagger of a New York cheesecake that thrilled us so much as the relief of not dealing with a water bath when baking it. A New York–style cheesecake hews more toward the European Käsekuchen model, a bit denser, a bit dryer—a texture often described as suede-like, or perhaps the cheesecake equivalent of a Cornish rex cat. A water-bath cheesecake takes after a Sara Lee prototype—light, almost mousse-y. By manipulating ingredient proportions just so, we managed to produce a filling that demands no water bath and whose baked texture comprises a bit of each style: delicate and silky toward the center (though clean-slicing like a pro) and creamy-dense toward the outer edge. It is a filling not overly burdened with sweetness, a filling that gets some sparkle from lemon-infused sugar. It is altogether dreamy—worth the calories, one might say.
This cheesecake begs for no further embellishment, though a touch of Strawberry Syrup certainly wouldn’t hurt.
Baking Notes
Cold cream cheese is recalcitrant and resistant to smoothing out, so remember to remove the blocks from the refrigerator at least an hour before you make the filling to allow them to warm to room temperature. Still, you’ll need to beat the daylights out of the cream cheese to persuade it to release its last remaining lumps—and even so, we ask that the batter be strained in case lumps sneak in on the sly. This step also removes the lemon zest that has relinquished its perfume to the batter. Also worth noting, the filling is scrape-intensive. You really cannot over-scrape the bowl while beating the batter.
Commercial cream cheese is so highly salted that we do not call for additional in the filling.
The correct final temperature of 150 to 155 degrees is crucial to achieve the sublime final texture which, properly baked, will demonstrate an appealing transition from suede to silk in a single slice. At this temperature, the center of the cake will be quite wet and jiggly, but with resting and refrigeration, it will set, so have faith. Both an accurate oven thermometer and a digital instant-read thermometer are essential.
The low oven temp means that the cake doesn’t color, even after 2½ hours of baking. A torch affords you the most control over browning, but a hot oven works, too.
To keep your slices pretty, run the knife blade under hot water every time you lift the knife. No need to really even dry the blade in between—just shake off excess drops and keep cutting.
equipment mise en place
For the graham cookie crust, you will need a digital kitchen scale; a small liquid measuring cup; a food processor; parchment paper; a rolling pin; a ruler; a baking sheet; a wire rack; a 9-inch round springform pan (with sides at least 3 inches high); a pastry brush; a medium bowl; a small offset metal spatula; and a wire rack.
For the filling and to bake the cheesecake, you will need a small bowl; a stand mixer fitted with the flat beater; a silicone spatula; a large, coarse-mesh strainer; a medium bowl; a rimmed baking sheet; a digital instant-read thermometer; a culinary torch, if you have one; a thin metal spatula or a paring knife; and a long metal spatula.
-
for the graham cookie crust:
-
1ounce whole milk, at room temperature
-
0.5ounce honey
-
4.5
-
2.5ounces Anson Mills Colonial Style Fine Cloth-Bolted Pastry Flour, plus additional for dusting
-
0.7ounce dark brown sugar
-
¼teaspoon fine sea salt
-
¼teaspoon baking soda
-
3ounces unsalted European-style butter, cut into small pieces and chilled, plus 1.5 ounces unsalted European-style butter, melted
-
2tablespoons granulated sugar
-
-
for the filling:
-
8ounces granulated sugar
-
¼cup finely grated lemon zest, from 3 or 4 large lemons, plus 1 ounce lemon juice
-
4large eggs, room temperature
-
2large egg yolks, room temperature
-
2teaspoons vanilla extract
-
2pounds cream cheese, room temperature
-
8ounces sour cream, room temperature
-
-
Make the graham cookie crust: Adjust an oven rack to the lower-middle position and heat the oven to 300 degrees. Combine the milk and honey in a small liquid measuring cup and stir to dissolve the honey into the milk.
-
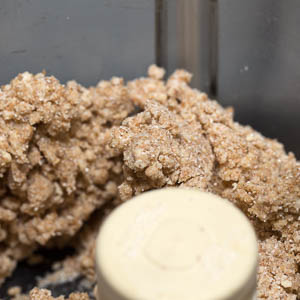
Place the flours, brown sugar, and salt in a food processor bowl and process until well-combined and no sugar lumps remain, 15 to 20 seconds. Scatter the butter pieces over the flour mixture and pulse to a coarse meal, about fifteen 1-second pulses. With the machine running, pour the milk mixture through the feed tube and continue to process until the dough chases itself around the bowl and will hold together when pinched between fingers (fig. 2.1), about 10 seconds.
-
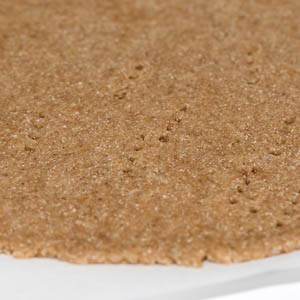
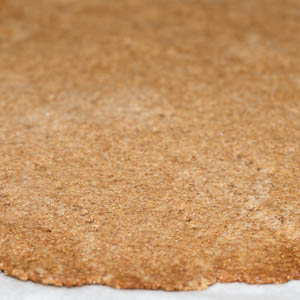
Lay a 12-inch sheet of parchment paper on the counter and dump the dough onto the parchment. Firmly press the dough together, flour the top lightly, and, using a rolling pin, roll it out into an oblong of an even 1/16-inch thickness. The shape of the dough is of little consequence but its thickness is important for even crisping. Prick the dough all over with a fork (fig. 3.1) and slide the parchment onto a baking sheet. Bake until the edges are well-browned (fig. 3.2) and the cookie is baked through, 30 to 35 minutes. Set the baking sheet on a wire rack and let cool to room temperature; leave the oven on. Once cooled, break the cookie into large pieces.
-
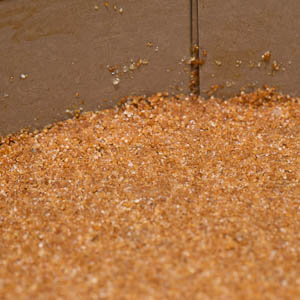
Brush the bottom and sides of a 9-inch round springform pan (with sides at least 3 inches high) with 2 teaspoons of the melted butter. Weigh out 8.5 ounces of the cookie pieces and turn them into the food processor bowl. (Eat the remaining pieces because it will be impossible not to.) Pulse to break the cookie pieces into smaller bits, then process until finely ground, about 10 seconds. Turn the crumbs into a medium bowl, add the granulated sugar and the remaining melted butter, and stir with a fork until the crumbs are evenly moistened. Turn the crumbs into the prepared pan and smooth with a small offset metal spatula or the back of a spoon. Press firmly to compact into an even layer. Bake until the crust is toasty brown and fragrant (fig. 4.1), 25 to 30 minutes. Let cool on the wire rack. Lower the oven temperature to 200 degrees.
-
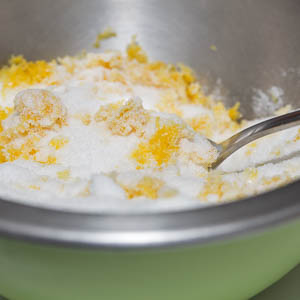
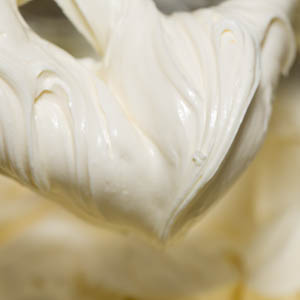
While the crust is cooling, prepare the filling: In a small bowl, stir together the granulated sugar and the lemon zest (fig. 5.1). Set a small bowl on a digital kitchen scale and crack the whole eggs into the bowl; they should weigh 7 ounces. If they weigh more, beat the eggs with a fork and pour off the excess. Add the yolks and beat with the fork, then beat in the vanilla. Set aside. Turn the cream cheese into the bowl of a stand mixer fitted with the flat beater and beat on medium-high speed until light and fluffy, pausing two or three times to scrape down the bowl with a silicone spatula, about 3 minutes. The cream cheese has a tendency to stick on the bottom of the bowl and to the flat-beater attachment, resulting in unexpected lumps in the batter, so be mindful! Add the sugar mixture and beat on medium-high speed, scraping down the bowl a few times, until it’s well incorporated into the cream cheese, about 2 minutes. Add the sour cream and beat on medium speed, scraping down the bowl as needed, until well combined, about 2 minutes more; the mixture will be thick and glossy (fig. 5.2). With the mixer running on medium-low speed, add the eggs a little at a time, mixing well after each addition and scraping down the bowl once or twice. Add the lemon juice and beat to combine. Remove the bowl from the mixer and scrape the bottom. The filling with be thick but heavily fluid.
-
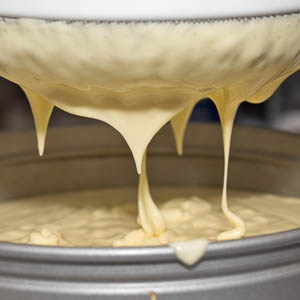
Set a large, coarse-mesh strainer over the springform pan or a medium bowl and pour the filling into the strainer, thoroughly scraping the mixer bowl. Lift the strainer to allow the batter to fall through (fig. 6.1). Scrape along the bottom of the strainer with the spatula to collect every drop of batter. Set the springform pan on a rimmed baking sheet; if the filling was strained into a bowl, pour it into the pan, scraping the bowl clean. Slide the baking sheet into the oven and bake until the cheesecake has risen slightly and a digital instant-read thermometer inserted in the center of the filling registers 150 to 155 degrees, about 2½ hours; the center will not yet be completely firm. Let cool on the baking sheet on the wire rack for 45 minutes to 1 hour. If you have a culinary torch, turn the oven off after removing the cheesecake; if you do not have a culinary torch, adjust the oven rack to the upper-middle position and heat the oven to 450 degrees.
-
To brown the cheesecake with a culinary torch, ignite the torch, adjust the flame to medium, and sweep it over the cheesecake at a distance of 6 inches or so, moving the flame constantly to brown the surface to a spotty dark brown (fig. 7.1). For the oven method, return the cheesecake to the oven and keep an eye on it, turning the pan a couple of times, until the surface is evenly dark brown; the timing depends on your oven. Let the cheesecake cool completely on the wire rack. Run a thin metal spatula or a paring knife between the edges of the cheesecake and the pan. Cover tightly with aluminum foil and refrigerate overnight.
-
To serve, unclasp and remove the sides of the springform pan. Slide a long metal spatula between the crust and the pan bottom to free the cheesecake. Carefully slide the cheesecake onto a serving platter and cut it into wedges. Leftovers will keep in the refrigerator for up to 3 days.
-
-
2.1
-
-
-
3.1
-
3.2
-
-
-
4.1
-
-
-
5.1
-
5.2
-
-
-
6.1
-
-
-
7.1
-