Japanese Milk Bread
introduction
Japan has grown wheat for centuries, but the soft, billowy loaf known as Japanese milk bread is a twentieth-century creature and rare among elevated bread forms in that it is easily mastered by an average home baker. The direct-rise bolted wheat formula bakes up tall and angular with a stately loft and beautiful tawny crust. Its crumb is moist, yielding, velvety soft, slow to stale, and its flavor is rich and slightly sweet—virtues attributable in some measure to the cooked rice-flour gel or “water roux” (yudane in Japanese, tangzhong in Chinese) used in its preparation.
Sometimes referred to as Hokkaido milk bread, a credit to the northern prefecture famous for its dairy products and the source of much of Japan’s milk, Japanese milk bread contains no more milk than any other pain de mie–style bread, but the name suggests a tenderness that is not misplaced. This recipe makes an exceptional loaf for sandwiches or toasting and the dough can be shaped into the best hot dog or hamburger buns you’ve ever tasted.
Baking Notes
We make the yudane in our recipe by cooking Carolina Gold rice flour and water into a thick paste. The paste is combined with the liquid ingredients and yeast before dry ingredients are added, producing a dough that is as smooth and stretchy as taffy. When handling strong, wet doughs like this, water, not flour, is, the preferred medium for bench work. Use a splash as a contact barrier between the dough, the work surface, and baker’s tools, including your hands. If the final dough grabs, sprinkle a few droplets and take control of the situation.
Deep, straight-sided loaf pans called Pullman pans make gorgeous sandwich loaves. They are sold with and without slide-on lids; you’ll need one with a lid for this recipe. Baked in a lidded Pullman pan, the bread forms sharp, neat corners and a tidy square shape that we appreciate in a sandwich loaf. We purchased nice, sturdy Pullman pans made by USA Pans online.
Proofing and baking in a lidded loaf pan can be tricky, as the solid top makes it impossible to monitor the dough’s progress. Follow the recipe instructions carefully and your loaf will bake up just as it should: flat-topped and crisp-crusted. When proofing, set a timer to avoid overdoing it—even a tight-fitting lid won’t prevent overproofed dough from spilling out during baking. If, on the other hand, you throw the loaf into the oven before it’s perfectly proofed, it won’t form a squared-off top. But who cares? The bread will still be rich, tender, and make damned good sandwiches.
If you would like to bake this bread for the Light and Crisp Thanksgiving Bread Stuffing recipe but don’t have time to track down a Pullman loaf pan, an enamel-coated cast-iron Dutch oven (such as Le Creuset or Staub) or a regular well-seasoned cast-iron Dutch oven measuring 8 to 8½ inches at the base and 9 to 10 inches across the top will work. The finished loaf will be circular in shape, of course, and fine for cutting into cubes for stuffing but not shapely as a sandwich bread. Heavily grease the Dutch oven and line the bottom with parchment paper. Round the dough as directed in step 6 of the recipe and proof it, covered, in the prepared vessel. Expect it to rise in 1½ to 2 hours. It will have filled the pot and look light and puffy. One hour into the second rise, adjust an oven rack to the lower-middle position and slide a pizza stone or baking steel onto the rack, then heat the oven to 425 degrees. Bake for 15 minutes at 425 degrees, reduce the oven temperature to 350 degrees, bake for 15 minutes, remove the lid, and bake for 10 to 15 minutes longer; the bread is done when the internal temperature registers 212 degrees.
equipment mise en place
For this recipe, you will need a digital kitchen scale; a heavy-bottomed small saucepan; a whisk; a small silicone spatula; a digital instant-read thermometer; a small bowl; a medium bowl; a stand mixer with the flat beater and dough hook; a plastic bowl scraper; a metal bench knife; a large bowl (ideally one made of ceramic); a 13 by 4 by 4-inch Pullman loaf pan with lid; a wire cooling rack; and an oven mitt.
-
-
35grams (1.2 ounces) Anson Mills Carolina Gold Rice Flour
-
135grams (4.8 ounces) spring or filtered water
-
455grams (16 ounces) Anson Mills French Mediterranean White Bread Flour, plus additional for dusting
-
35grams (1.2 ounces) sugar
-
6grams (0.2 ounces) fine sea salt
-
160grams (5.6 ounces) whole milk, cool room temperature
-
8grams (0.25 ounces) instant yeast
-
1large egg, room temperature
-
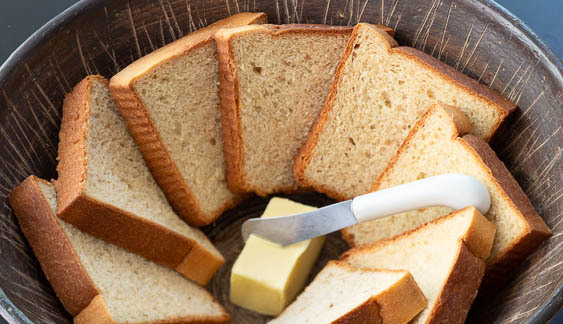
56grams (2 ounces) European-style unsalted butter, cut into ½-inch cubes, cool room temperature
-
-
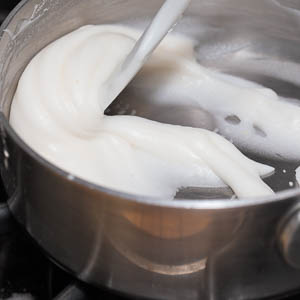
In a heavy-bottomed small saucepan, whisk together the rice flour and water. Set the pan over low heat and cook, stirring constantly with a small silicone spatula and scraping the bottom of the pan, until the mixture has gelled into a thick paste (fig. 1.1) and registers 160 degrees on an instant-read thermometer. Press a piece of plastic wrap directly against the surface to prevent a skin from forming, then refrigerate until the yudane is cool to the touch, about 30 minutes.
-
In a medium bowl, whisk together the bread flour, sugar, and salt. In the bowl of a stand mixer, combine the milk and yeast, then whisk until the yeast dissolves. Add the egg and the yudane and whisk until well combined. Add the dry ingredients and mix with the flat beater on low speed until the ingredients form a stiff, sticky dough, about 45 seconds. Using a plastic bowl scraper, scrape down the bottom and sides of the bowl to ensure no bits of flour remain. Remove the paddle attachment. Cover the bowl and let the dough rest for 10 to 15 minutes.
-
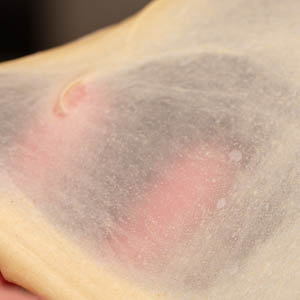
Attach the dough hook to the mixer. With the mixer running on medium-low speed, add the butter cubes a few pieces at a time; scrape down the sides of the bowl as needed. After all the butter has been added, increase the speed to medium and mix until the dough is taffy-like and pulls away from the sides and bottom of the bowl, about 7 minutes. Pinch off a piece of dough and gently pull it with your hands; it should stretch into a thin, translucent film without tearing (fig. 3.2). If the dough tears, mix for 1 to 2 minutes longer, then test again.
-
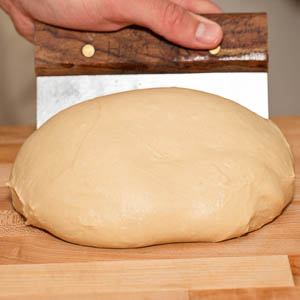
Wet your work surface with a thin film of water to prevent the dough from sticking. Using the bowl scraper, scrape the dough onto the moistened surface. Hold a water-dampened metal bench knife at a 45-degree angle to the work surface and push the dough—essentially scraping it—toward your other hand. As the dough moves, its surface will start to tighten and the mass will form an oblong. Rotate the dough 90 degrees, and repeat the pushing/scraping process until its surface is nice and taut (fig. 4.1). Spray a large bowl (ideally one made of ceramic) with nonstick cooking spray, then transfer the dough to the bowl. Cover the bowl with plastic wrap and set it in a warm spot. Let rise until the dough is doubled in size (fig. 4.2), about 2 hours, depending on the ambient temperature.
-
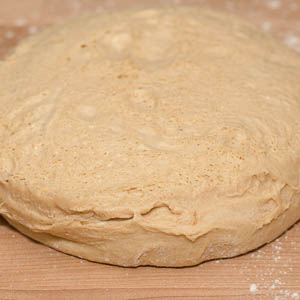
Lightly flour the work surface and dust the surface of the dough with flour. Run the bowl scraper around the edges of the dough to release it from the bowl, then invert the bowl, allowing the dough to drop onto the floured surface. The dough will be very puffy (fig. 5.1), a sign of healthy fermentation. Sprinkle the dough with flour and pat it with your hands to de-gas thoroughly.
-
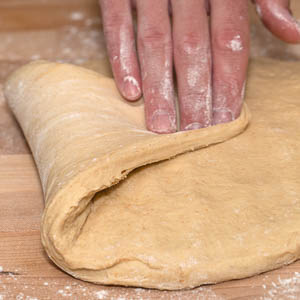
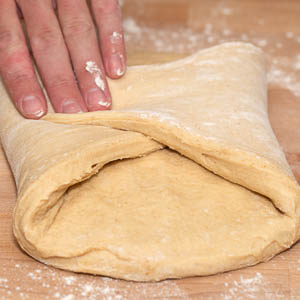
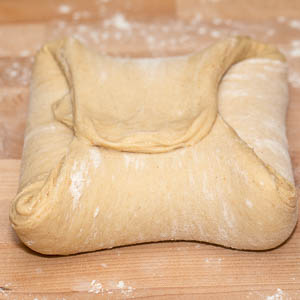
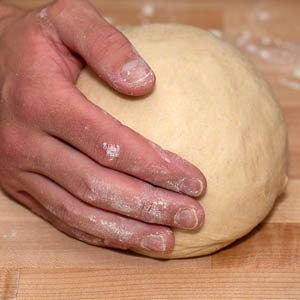
Take the right edge of the dough and fold it to the center (fig. 6.1), then fold the left edge to the center (fig. 6.2). Repeat with the bottom and the top. The dough should now be squarish in shape (fig. 6.3). Flip over the dough, cup your hands around its sides, then move your hands together in a tight circular motion, dragging the dough along and allowing its bottom to grip the work surface. Continue to “round” the dough until it forms a compact ball with a smooth, taut surface (fig. 6.4). Cover with a clean kitchen towel and let rest for 15 to 20 minutes.
-
Spray a 13 by 4 by 4-inch Pullman loaf pan with nonstick cooking spray. Dust the top of the dough with flour. Using the bench knife, scrape up the dough mass and flip it over. Dust again with flour and de-gas by pressing with your hands. Stretch the dough to a rectangle about the length of the loaf pan and about ½ inch thick; position the rectangle so that it is parallel with the counter’s edge. Starting at the side nearest you, tightly roll up the dough, pressing along the seam that forms as you roll. Press along the final seam to seal. Roll the dough seam side down and coax it into a uniformly thick cylinder.
-
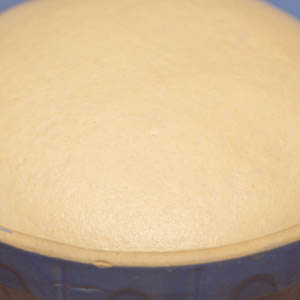
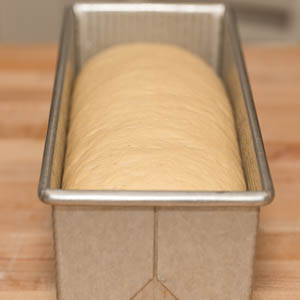
Place the dough in the prepared pan—it should make contact with the small ends of the pan and come close to the long sides, too. Mist a sheet of plastic wrap with nonstick cooking spray and lay it over the top of the pan. Let the dough rise until it is about ½ inch shy of the top of the pan (fig. 8.1), 1½ to 2 hours. Meanwhile, adjust an oven rack to the lower-middle position and heat the oven to 425 degrees.
-
When the dough is properly risen, remove the plastic wrap. Spray the inside of Pullman lid with nonstick cooking spray. Slide the lid onto the pan, then let the dough rise for 15 minutes longer. Do not open the lid to check; if the dough has made even the slightest contact with the lid, it will tear if the lid is moved.
-
Slide the pan into the oven and immediately reduce the oven temperature to 350 degrees. Bake for 30 minutes. Remove the pan from the oven (make sure to close the oven door), then slide off the lid; the top of the loaf will be perfectly flat and lightly golden. Return to the oven and continue to bake until the loaf is deep golden brown and the sides are rigid, 10 to 15 minutes longer.
-
Remove the pan from the oven and set it on a wire rack. Immediately invert the loaf into an oven mitt–clad hand, then set the bread bottom side up directly on the rack. Let cool for at least 1 hour before slicing, or for thinner, more uniform slices, let cool for several hours.
-
-
1.1
-
-
-
3.1
-
-
-
4.1
-
4.2
-
-
-
5.1
-
-
-
6.1
-
6.2
-
6.3
-
6.4
-
-
-
8.1
-