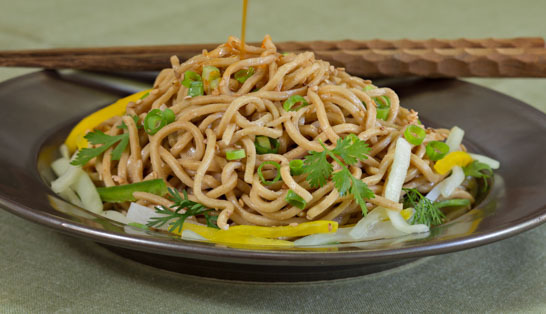
Chilled Sesame Noodles
introduction
We, at Anson Mills, are not chefs (though we once played them in real life). We serve at the pleasure of chefs, and are honored to support and nurture an ingredient stream that might stir up the next—or former—great thing. More than a few of the recipes we’ve borne to this site were bred of our disappointment in one trending dish or another. It seems to occur particularly in the execution of pan-Asian fare—dishes with historic appeal and integrity that get splashed into cult status on menus and in reviews, then descend quickly into a losing streak when chefs realize the production of authentic recipes is labor intensive and expensive. This is where we come in, trailing on the sparkly tail of a waning comet—first with soba, then with udon, then with steamed pork buns, and now with sesame noodles.
These are all great foods with big crave buttons at their very center. Sesame noodles figure simultaneously among the most satisfying and, sadly, most misappropriated of all, particularly when the default setting on this glorious dish goes to boxed spaghetti and a jar of Jif. A lot of sesame noodles end up resembling peanut butter kugel (were there such a thing).
To the noodles first. With the varieties of wheat and milling settings available to us, they weren’t tough to make. We took Anson Mills 100-screen pasta flour and Harold McGee’s “baked” baking soda technique to produce alkaline noodles with snap and slither (our phrase, not his). We won’t go into the science of baked soda here (it has to do with water and carbon dioxide evaporation from the soda as it bakes, which creates a stronger alkali), but the technique toughens the protein in wheat and changes the pH of the dough, making the noodles yellow and pleasantly slippery—like the noodles in a bowl of ramen. Alkalis, from lime to baking soda, are capable of unimaginable magic, turning corn into masa and wheat into pretzels. The alkaline noodles we produced with our flour and this technique are, in their own way, pretty magical, as well. They are embarrassingly easy to make and have remarkable flavor and texture.
For the dressing, we chose a style more fluid and nuanced than the average American “sesame” dressing, and more balanced and satisfying than the average Chinese dressing (which is generally straight-up sesame oil). Peanut butter, borrowed to induce a creamy texture, did not find its way into our formula. Instead, Anson Mills’ highly flavored Sea Island benne seeds, blended with toasted sesame oil and small, but crucial draughts of other bright components, produce a dressing with the round-and-round umami appeal that only Asian dishes can approach.
We dressed up the ensemble with a bright little salad of chilled julienned cucumber, bell pepper, jalapeño, daikon, and scallions, and added, almost as an afterthought, a mesmerizingly complex chile oil to pass at table. We’re pretty thrilled with the results—and so were our friends, who oohed and ahhed their way through tubs of this stuff in August.
Cooking Remarks
To make the baked baking soda, distribute ¼ cup baking soda on a small aluminum foil–lined baking sheet and bake at 250 degrees for 1 hour; the baking soda will not change color or look any different. Tip the soda from the foil into a small glass jar, seal tightly, and set aside until ready to use. The soda keeps indefinitely.
The dough is no peach at the beginning. It’s tough and cranky and tries to handle you back. Normal kneading is out of the question. Don’t react. Just muscle it into a plastic bag and let it sulk for an hour or two. Once you’re ready to roll, the dough will allow itself to be led through the pasta machine with no problems whatsoever. It doesn’t require flour to roll out or cut!
Pertaining to the sauce: we tried valiantly to avoid dragging the blender out, but in the end it was summoned. As annoying as it is to reach down and dig substances out of its blades or to clean it afterwards, the blender gave us a beautiful, smooth emulsified sauce that the food processor could not deliver.
equipment mise en place
For the noodles, you will need a small bowl, a baby whisk, a food processor, a small zipper-lock plastic bag, a bench knife, a rolling pin, a pasta machine with a spaghetti cutter, a sheet pan, a stockpot for boiling water, a pair of tongs, and a footed colander.
For the sauce, you will need a small heavy skillet, a blender, a small offset spatula, a rubber spatula, a fine conical strainer, and a small bowl.
For the garnish, you will need a small bowl and a grater.
-
for the noodles:
-
12ounces (2⅓ cups plus 1 tablespoon) Anson Mills Farina di Maccheroni ‘oo’ Crema (Pasta Maker’s Flour)
-
1½teaspoons baked baking soda (see Cooking Remarks)
-
4.4ounces (½ cup plus 1 tablespoon) spring or filtered water
-
-
for the sauce:
-
2ounces (½ cup) Anson Mills Sea Island Benne Seeds
-
2ounces (¼ cup) toasted sesame oil
-
2.4ounces (4 tablespoons plus 2 teaspoons) soy sauce, preferably raw
-
1ounce (2 tablespoons) rice vinegar
-
1ounce (2 tablespoons) brown sugar
-
1(1-inch) knob of ginger, peeled and chopped
-
2medium garlic cloves, peeled and chopped
-
1small to medium shallot, peeled and chopped
-
-
for the garnish:
-
1ounce (2 tablespoons) rice vinegar
-
1teaspoon granulated sugar
-
2teaspoons finely grated lemon zest
-
Fine sea salt and freshly ground black pepper
-
1large cucumber
-
1medium yellow bell pepper
-
1medium jalapeño chile
-
1(4-inch) piece daikon radish
-
3slender scallions
-
Reserved 2 teaspoons toasted benne seeds
-
Cilantro leaves
-
1recipe Three Peppercorn Asian Chile Oil, optional
-
-
-
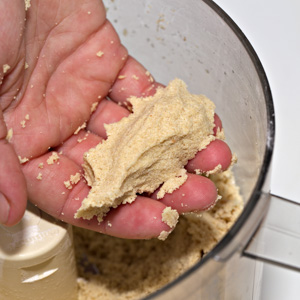
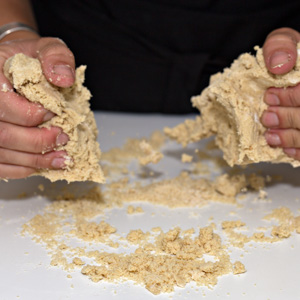
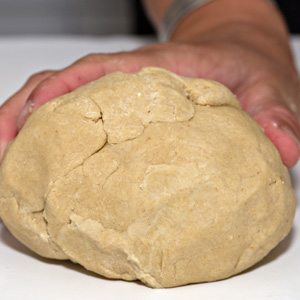
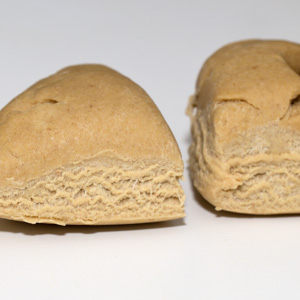
Make the noodle dough: In a liquid measuring cup or small bowl, weigh out the water, then sprinkle the baked soda little by little on the surface (this will help prevent the soda from clotting at the bottom of the bowl). Use a small whisk to work out any remaining clots. Turn the flour into a food processor. With the machine running, pour the water mixture through the feed tube and process for 20 seconds once all the liquid has been added. The mixture will not come together in a ball, but if you grip it in your fist it should be just damp enough to hold its shape (fig. 1.1). Dump the mixture onto a work surface, grab it together (fig. 1.2), and knead for a couple of minutes to bring it into a dough (fig. 1.3) This will be a mean-spirited dough that fights back, and may show worrisome seams along its surface. Don’t worry. Turn the dough into a zipper-lock plastic bag, seal well, and let it sulk for at least 1 hour or up to 4 hours at room temperature.
-
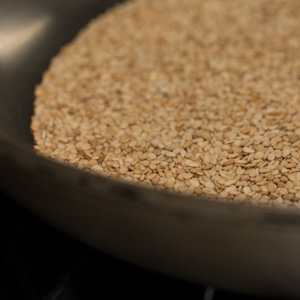
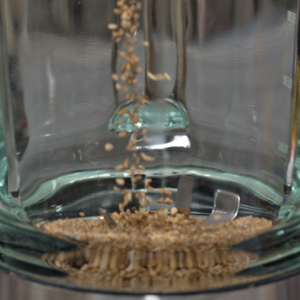
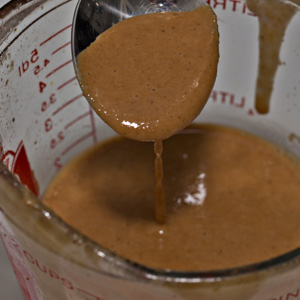
Make the sauce: In a heavy-bottomed medium skillet, toast the benne over low heat, frequently shaking the pan, until golden brown, about 10 minutes (fig. 2.1). Set aside 2 teaspoons of seeds for garnish and turn the remaining screeching hot seeds into a blender jar. Process (fig. 2.2) until the seeds are ground, pausing occasionally to scrape down the jar and loosen the seeds from the base of the blender with a small offset spatula, about 40 seconds. Remove the center part of the blender lid but keep the blender covered. With the blender running on high speed, pour in the sesame oil and process for 20 seconds, pausing to scrape down the jar with a small metal spatula. Lower the speed to medium and pour in the soy sauce, rice vinegar, and sugar. Process for 30 seconds more. Pause the blender and scrape down the jar. Continue to run the blender, adding the chopped ginger, garlic, and shallot. Process on high until the mixture is smooth, pausing once or twice to scrape down the jar. Remove the blender jar and pour the sauce into a fine-mesh strainer set over a small bowl (fig. 2.3). Scrape out the jar with a rubber spatula, then press the sauce through the strainer with the back of a spoon. Discard the solids. Cover the sauce with plastic wrap and set it aside.
-
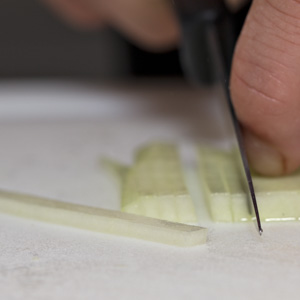
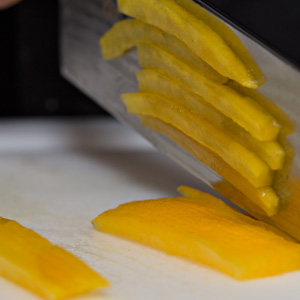
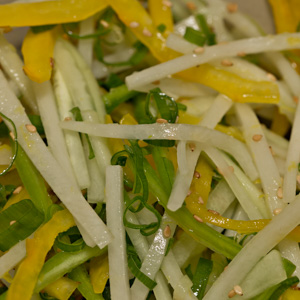
Prepare the garnish: In a small bowl, whisk together the rice vinegar, sugar, lemon zest, ¼ teaspoon salt, and ⅛ teaspoon pepper until the sugar dissolves. Peel the cucumber and trim off the ends. Cut the cucumber in half lengthwise and halve each piece lengthwise again, creating four quadrants. Lay each quadrant seed side up and use a sharp paring knife with the blade held parallel to the work surface to slice off the seeds. Cut the pieces crosswise into three 2-inch planks. If the pieces are thick, trim them into ⅛-inch-thick planks, and then cut the planks lengthwise into ⅛-inch julienne strips (fig. 3.1). Turn the julienned cucumbers into a medium bowl. Use a sharp vegetable peeler to remove the skin of the bell pepper, then lob off its top and bottom. Slit down one side of the pepper to open it and lay it flat, skin side down. Hold the blade of the paring knife parallel to the work surface and slide it along the pepper to remove the core and ribs. Cut the pepper into planks and cut the planks into fine julienne strips (about ⅛ inch wide and ⅛ inch thick) (fig. 3.2). Toss them into the bowl with the cucumbers. Use the vegetable peeler to remove the skin of the jalapeño. Halve, seed, and julienne the jalapeño and add it to the other vegetables. Peel the daikon and cut it crosswise into thirds. Square the edges with a chef’s knife. Slice the pieces lengthwise into ⅛-inch planks, and then into ⅛-wide julienne. Toss them into the bowl with the rest. Slice the scallions very finely and add them, along with the lemon zest, to the bowl. Pour the vinegar mixture over the vegetables and toss to combine (fig. 3.3). Taste for seasoning, cover with plastic wrap, and refrigerate until ready to use.
-
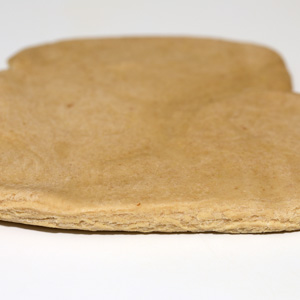
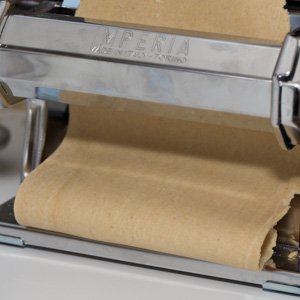
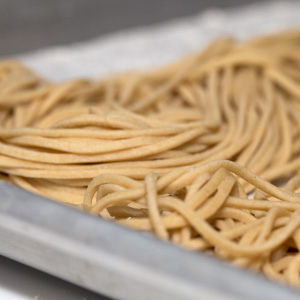
Roll the dough and cut the noodles: Set up a pasta machine with a spaghetti cutter and line a baking sheet with parchment. With a bench knife or chef’s knife, cut the dough into quarters (fig. 4.1). Using a rolling pin, roll each piece of dough into a rectangle roughly 5 inches long, 4 inches wide, and ¼ inch thick (don’t be too concerned about the dimensions); you will not need to flour the dough (fig. 4.2) for rolling. Working with one piece at a time and keeping the rest in the zipper-lock bag, pass the dough twice through the widest setting of the pasta machine, and then progress through the next few settings, passing the dough twice through each, until the dough sheet is between 1/16 and ⅛ inch thick (likely setting 4, although machines may differ somewhat) (fig. 4.3). Move the crank to the spaghetti cutter and feed the dough sheet through the cutter (fig. 4.4). Lay the noodles, looped in half, on the prepared baking sheet.
-
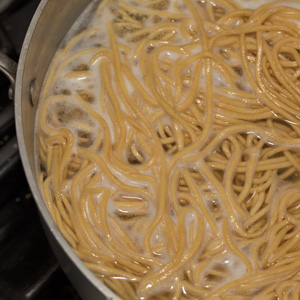
Finish the dish: Bring a large pot of water to a boil over high heat. Lower the noodles into the water, stir with tongs, and cover. As soon as the water returns to a boil (fig. 5.1) drain the noodles in a footed colander set in the sink and immediately run cold water over them, tossing with your fingers. Shake the colander to remove excess water, and then turn the noodles into a large bowl. Add half of the sauce to the noodles and toss with chopsticks or your fingers. Taste for seasoning and flavor and add as much additional sauce as you desire; the noodles should be lightly and evenly coated. Portion the noodles into individual bowls and top with the vegetable garnish, reserved benne seeds, and cilantro. Serve immediately. The chile oil we offer as a companion to these noodles is highly recommended.
-
-
1.1
-
1.2
-
1.3
-
-
-
2.1
-
2.2
-
2.3
-
-
-
3.1
-
3.2
-
3.3
-
-
-
4.1
-
4.2
-
4.3
-
4.4
-
-
-
5.1
-