Rhubarb Upside-Down Cake
introduction
We can all imagine how upside-down cakes evolved. Once upon a time, before there were ovens, cakes were baked on the hearth. The cakes often contained fruit. In time, the French created tarte tatin. Americans created pineapple upside-down cake.
No judgment. Love them both.
Anyone looking for a spring dessert with fruit is going to find rhubarb on her very short list of options (notwithstanding that rhubarb is technically not a fruit) And rhubarb can be sort of touchy, meaning its sweet spot isn’t easy to find. Under heat, any heat, rhubarb goes from crisp and proud into meltdown mode precipitously—much faster than its visual twin, celery, for instance—and sheds an alarming amount of water weight in the process. Nor is an upside-down cake with its mysterious mosaic of fruit—unveiled only when the cake is flipped on its belly after baking—without its difficulties. Things get sticky, things get stuck. Stuff burns.
We decided to give rhubarb slices a shot at drying out in a low oven, reasoning it might concentrate their flavor, evaporate away some of their juices, and allow the slices to keep their shape. Our reasoning proved to be true. The rhubarb’s color also intensified from beet red to a rich Bordeaux etched with dark Bordeaux—a pleasant surprise. And the rhubarb didn’t become weep uncontrollably while the cake baked, but instead stayed pretty and shapely. For the cake’s crown, we chose to caramelize white sugar—as older upside-down cake recipes do—rather than using brown sugar.
Of course we petitioned Anson Mills cake flour to create a luscious, thick batter that would behave itself when dropped on the fruit and would bake into a fine, moist flavorful cake. We would be remiss if we didn’t recognize its contribution to this recipe—the crumb and flavor of this cake are simply unsurpassed.
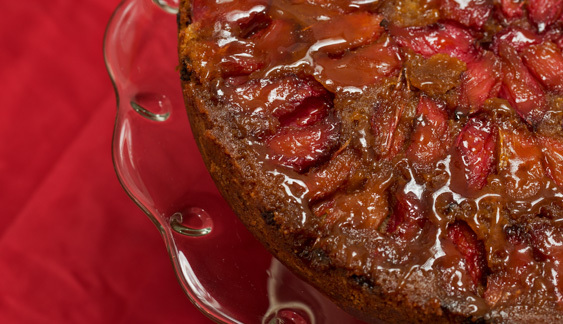
The finished recipe is pretty much a revelation. The rhubarb does its bracing astringent thing straight into the caramel (contrapuntal major), while the cake stays downy soft and tender. The outer band of cake crust with its sticky caramel and rhubarb intaglio is the best part of the whole adventure.
Baking Notes
Rhubarb has a very brief season, and when it is in stores or farmers’ markets, quantities are usually quite limited. However, try to select stalks that are hefty rather than slender. Thick stalks mean fewer and larger slices that are easy to arrange on the wire rack for drying, and then in the caramel-lined cake pan.
The creaming sequence of this recipe is very important. Beat the butter twice as long as you normally would and indulge the butter with frequent scraping-downs. Add the sugar and beat twice as long as you normally would. Scrape, scrape. Add the eggs a little at a time. Scrape, scrape. The directions are not unique to this cake—any cake that employs the creaming method will benefit from a good beating.
equipment mise en place
For this recipe, you will need a digital kitchen scale; a sturdy 9-inch round cake pan; parchment paper; a cooling rack with a wire grid (not parallel slats) that fits into a rimmed baking sheet; a rimmed baking sheet; a thin metal spatula; a clean, dry, heavy-bottomed medium saucepan; a wooden spoon; a whisk; a rasp-style grater; a medium mixing bowl; a fine-mesh sieve or sifter; a 2-cup liquid measuring cup (or similarly sized bowl); a stand mixer with a flat beater attachment; a rubber spatula; a small metal offset spatula; and a serving platter.
-
for the rhubarb:
-
1½pounds crisp, richly hued rhubarb stalks, washed and trimmed
-
7ounces sugar
-
2ounces hot water
-
0.5ounce unsalted European-style butter
-
1lemon
-
-
for the cake:
-
7.5ounces Anson Mills Artisan Fine Cloth-Bolted White Lammas Cake Flour, plus additional for the pan
-
1½teaspoons baking powder
-
Scant ½ teaspoon fine sea salt
-
3large eggs plus 1 large egg yolk, room temperature
-
2teaspoons vanilla extract
-
7ounces unsalted European-style butter, room temperature, plus additional for greasing the pan
-
7ounces sugar
-
4ounces sour cream (drain off any surface liquid before measuring)
-
-
Adjust the oven rack to middle position and heat the oven to 150 or 200 degrees (depending on your oven’s lowest setting). Butter and flour the inside of a sturdy 9-inch round cake pan and line the bottom with a parchment-paper round; do not butter the parchment.
-
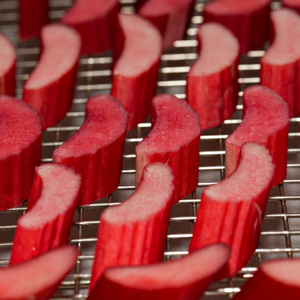
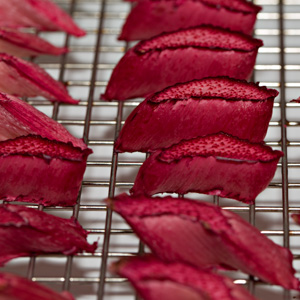
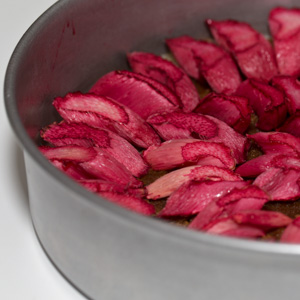
Prepare the rhubarb: Place a cooling rack with a wire grid in a rimmed baking sheet and lightly spray the rack with nonstick cooking spray. Cut the rhubarb diagonally into ¾-inch-thick slices and line them up, cut side up, on the prepared rack (fig. 2.1). Put the rhubarb into the oven on the middle rack and leave it there until the slices have lost much of their moisture, have deepened in color, and are dry to the touch (fig. 2.2), about 2 hours. Remove the baking sheet from the oven and increase the oven temperature to 350 degrees. With a thin metal spatula, loosen the rhubarb slices from the wire rack and set aside.
-
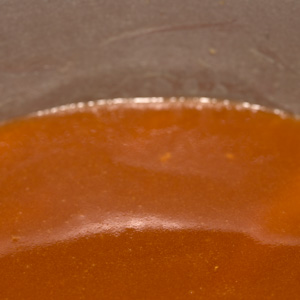
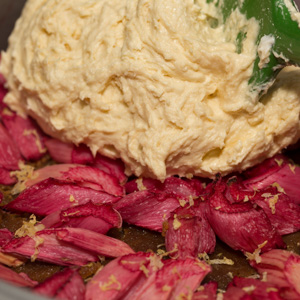
Pour the sugar into a clean, dry, heavy-bottomed medium saucepan. Set the saucepan over medium heat and allow the sugar to melt without stirring. When a thick band of caramel appears bubbling along the edge of the saucepan, use a wooden spoon to stir the unmelted sugar into the caramel. Continue cooking and stirring from time to time. When the sugar has completely melted, the caramel will have a glassy, deep-amber sheen and show no granularity (fig. 3.1). Remove the saucepan from the heat and wait 30 seconds. Meanwhile, place the prepared cake pan in the oven to warm it so the caramel will not stiffen upon contact. Add the hot water to the caramel and whisk vigorously to incorporate. Whisk in the butter until fully incorporated. Remove the cake pan from the oven and pour the caramel into it; tilt the pan to coat the entire bottom surface (fig. 3.2). Grate the zest from the lemon with a rasp-style grater and sprinkle it evenly over the caramel. Let cool to room temperature.
-
Lay the rhubarb slices in a pretty circular pattern on the surface of the caramel, leaving a bit of daylight between the pieces and rows (fig. 4.1). In other words, don’t overcrowd the pan—you will have more rhubarb than you can use.
-
Mix the cake: In a medium mixing bowl, whisk together the flour, baking powder, and salt, and then sift the mixture onto a sheet of parchment paper. In a 2-cup liquid measuring cup (or a similarly sized bowl), whisk together the whole eggs and egg yolk. Add the vanilla extract and whisk well to combine
-
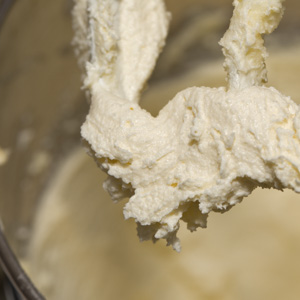
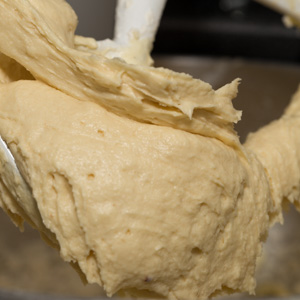
In the bowl of a stand mixer fitted with the flat beater attachment, beat the butter on medium speed until light and fluffy, about 2 minutes. Scrape down the bowl with a rubber spatula. With the mixer running on medium-low speed, add the sugar, and then increase the speed to medium-high and beat until the mixture is light and aerated, at least 3 minutes, scraping down the bowl once or twice (fig. 6.1). With the mixer running on low speed, add the beaten eggs about 2 tablespoons at a time, beating between additions and scraping down the bowl two or three times. Now, with the mixer still running on low speed, add the sour cream and mix until combined. Scrape down the bowl. With the mixer running on low speed, add the dry ingredients. As soon as they are incorporated, increase the speed to medium-high and beat for 5 seconds. Stop the mixer and scrape down the bowl. The batter will be fairly thick (fig. 6.2).
-
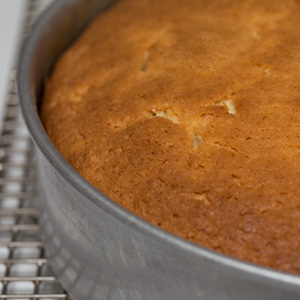
Using the rubber spatula, drop big dollops of batter onto the rhubarb, making an effort not to blemish the pattern (fig. 7.1). Smooth the top with a small metal offset spatula. Bake until the cake is nicely risen and golden brown and a wooden skewer inserted into the center comes out clean, 45 to 50 minutes, rotating the pan once halfway through baking.
-
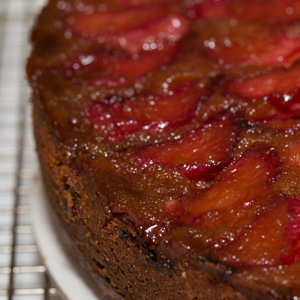
Let cool on a wire rack for 10 minutes (fig. 8.1). Run a small offset spatula between the cake and the pan to loosen the sides. Invert a serving platter over the cake pan, and, holding the platter and pan together, flip both over. Lift off the cake pan and remove the parchment round (fig. 8.2). Let cool completely before serving.
-
-
2.1
-
2.2
-
-
-
3.1

-
3.2
-
-
-
4.1
-
-
-
6.1
-
6.2
-
-
-
7.1
-
-
-
8.1
-
8.2
-