Fettuccine Fermentata
introduction
In form and substance, noodles fall into the highest tier of pleasure known to tooth and tongue. Yet far fewer of us cook pasta at home or order it in restaurants than we did in the past. Gluten notwithstanding, pasta—like other simple carbs—has been forced offstage while vegetables take standing ovations. Unless you are dining in Abruzzo or simmering Nonna’s secret gravy for guests, twirling a skein of pasta on a fork—even when handmade and tasty as hell—feels like a guilty pleasure.
But add an active ferment and Anson Mills Ancient Emmer Semolina to a pasta formula and the prescription changes dramatically. Even before cooking, the pasta is no longer “raw.” Nutty and complex, though mild in flavor, these supple, snappy noodles love sauce of any kind. And they won’t leave you with postprandial regret.
Do we suggest that you ferment flour and water from the ground up just to make this pasta? Perhaps not, but for bakers who have already discovered the wonder of natural levain breads, this recipe is a perfect starting place for further exploration of natural levain and its applications.
Cooking Remarks
The addition of active levain means this dough is alive. If left unchecked, the yeasts and bacteria may overferment, breaking down the pasta’s texture and producing less than desirable flavors. So take note of resting times and internal temperatures and don’t neglect the dough.
This is also a stiff dough, so stiff that it's no match for an electric mixer. Assume a power stance at the countertop and get ready to work your forearms, but don’t short the kneading—this dough demands a solid 10 minutes of manual manipulation. Pasta dough is nearly impossible to overwork by hand—in fact, it is commonly underkneaded—so bump some tunes and feel the knead!
A note about equipment: pasta machines vary slightly from brand to brand. Pay attention to the dimensional phrasing in the recipe but be prepared to make adjustments to adapt to your particular device. A fettuccine cutter comes standard with many machines, so that is the shape this recipe yields, but the pasta may instead be cut into linguine or spaghetti, if you have those attachments.
Just-made pasta is fresh pasta, ready to be cooked and served posthaste. We think a slightly drier pasta, however, tastes even better. Flavor nuances become more pronounced as bacteria and yeasts continue to make mischief in the dough. Left uncovered and unsupervised in the fridge for a full 48 hours, and the pasta dehydrates completely. It is ready for longer-term (two-week) ambient temperature storage.
equipment mise en place
For this recipe, you will need a digital kitchen scale; a small saucepan; a digital instant-read thermometer; a quart-size, wide-mouthed mason jar; a small silicone spatula; a medium bowl; a small dry measuring cup; a fork; a metal bench knife; a pasta machine with a fettuccine attachment; a rolling pin; a ruler; a chef’s knife or pizza wheel; and two rimmed baking sheets.
-
for feeding the final levain:
-
85grams spring or filtered water
-
15grams Red Fife Natural Levain
-
135grams Anson Mills Ancient Emmer Semolina, room temperature
-
-
for the dough:
-
310grams Anson Mills Ancient Emmer Semolina, room temperature, plus additional for dusting
-
5grams fine sea salt
-
220grams final levain
-
6large egg yolks
-
15grams extra-virgin olive oil
-
-
Feed the final levain: In a small saucepan, warm the water to 90 degrees. Pour the water into a quart-size, wide-mouthed mason jar, add the Red Fife Natural Levain, and stir with a small silicone spatula until well combined. Add the semolina and stir until homogenous. Scrape down the sides of the container, then cover, loosely tightening the metal band. Let stand at warm room temperature until the levain has tripled in volume, 8 to 10 hours.
-
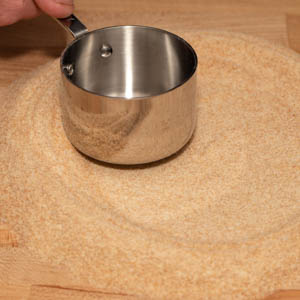
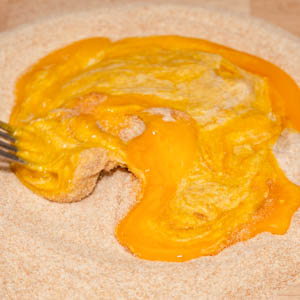
Mix the final dough: In a medium bowl, stir together the flour and salt, then turn the mixture onto your work surface. Using the bottom of a small dry measuring cup, “stir” a shallow 6- to 8-inch well in the center (fig. 2.1). Add the levain, egg yolks, and olive oil to the well, then beat with a fork, starting at the center and working outward, to combine the wet and dry ingredients (fig. 2.2). Once the mixture becomes too thick for the fork, trade the fork for a metal bench knife.
-
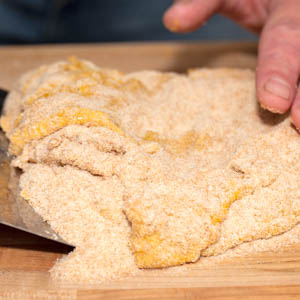
Using the bench knife, scrape under the mixture, then lift, fold it over itself, and press (fig. 3.1). Continue to scrape, lift, fold, and press working around the circumference of the mass, until the dry ingredients absorb the wet ingredients and a shaggy, sticky dough forms (fig. 3.2).
-
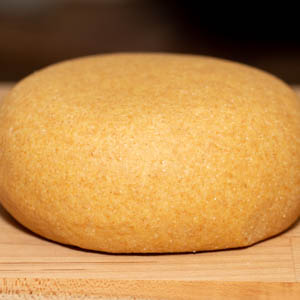
Scrape off any bits stuck to the bench knife and add them to the dough; set the bench knife aside. Knead the dough by hand until it is smooth and supple, at least 10 minutes. At first the dough will feel slightly tacky and wet but as you continue to knead, the semolina will hydrate and the dough will feel drier; the desired internal temperature is 75 to 80 degrees (fig. 4.1). Press the dough into a disk about 1 inch thick and wrap it in plastic wrap. Let rest at room temperature for 30 minutes, then refrigerate for at least 1 hour or up to 12.
-
Set up your pasta machine. Remove the dough from the refrigerator, unwrap it, and cut it into quarters with the bench knife. Set one quarter on your work surface; wrap the remaining 3 pieces and return them to the refrigerator to avoid overfermentation. Using a rolling pin but no additional flour, roll out the first piece of dough into a band about ⅛ inch thick and about 5 inches wide—just thin and narrow enough to fit through the first setting of the pasta machine.
-
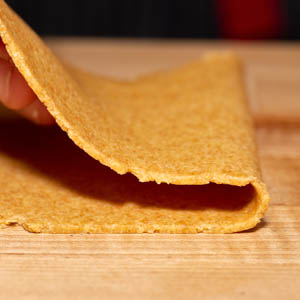
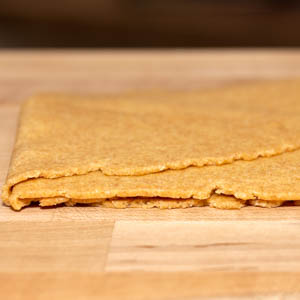
Pass the dough through the widest setting of the pasta machine; no additional flour should be needed. Now run the dough through the second setting; it’s fine if the edges look a little ragged and torn. Lay the sheet on the work surface. Measure 5 inches in from a short end of the sheet and fold the pasta onto itself at that mark (fig. 6.1). Continue to fold 5-inch sections along the length of the sheet—like folding fabric on a bolt—until you reach the other end and have a rough square (fig 6.2). Position the open ends of the square to the top and bottom and, using the rolling pin, roll the dough to a ⅛-inch thickness, maintaining the 5-inch width.
-
Pass the dough once again through the first setting of the pasta machine, then continue to run it through each subsequent setting until the sheet is about 2 millimeters thick, likely the fourth or fifth setting on the machine. Make sure the pasta sheet remains straight and does not fold over itself as it passes through the rollers. The final sheet will measure about 27 inches long. Lay it on the work surface, then use a chef’s knife or pizza wheel to cut it crosswise into 3 pieces, each about 9 inches in length. Lightly dust each sheet with semolina, stack them on a rimmed baking sheet, and refrigerate uncovered. Repeat the process with the remaining three portions of dough, stacking them on the same baking sheet.
-
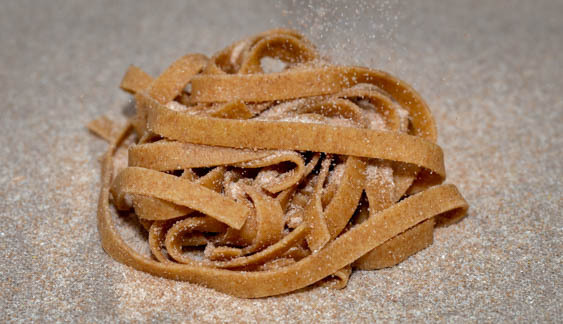
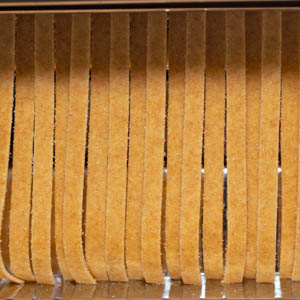
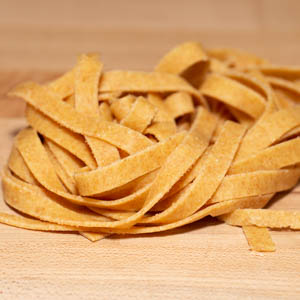
Dust a second rimmed baking sheet with semolina. Attach the fettuccine cutter to your pasta machine. One sheet at a time, pass the pasta through the cutter (fig. 8.1). Dust the noodles with semolina, form them into little nests, each weighing about 2 ounces (fig. 8.2), and place on the prepared baking sheet. Repeat with the remaining pasta sheets. At this point, the pasta may be cooked and served or it may be partially or fully dehydrated.
-
If desired, dehydrate the pasta: Return the baking sheet, uncovered, to the refrigerator. For partially dehydrated pasta, allow to dry for 24 hours; for fully dehydrated pasta, allow to dry for 48 hours.
-
-
2.1
-
2.2
-
-
-
3.1
-
3.2

-
-
-
4.1
-
-
-
6.1
-
6.2
-
-
-
8.1
-
8.2
-
recipe by Henry Jones