Bûche de Noël
introduction
Any baker with cherished Christmas traditions and an artistic bent will enjoy the craftsy rigor and rewards of making a bûche de noël. With or without meringue mushrooms, and dusted or not with sugar snow, a bûche has the ability to thrill, delight, and impress guests in a way no pie or cheesecake ever could. But despite its woodland magic and trompe l’oeil aspirations, it is not difficult to make.
In pre-medieval winter solstice customs, burning a big log in the hearth cleared the way for a prosperous new year, and the log’s ashes were collected and kept as a charm to ward off evil. Over time, as paganism gave way to Christianity and home hearths became smaller in size, the winter tradition of the burning log evolved, too. Eventually, the log was only symbolic . . . and showed up on the Yuletide table as a cake. (Because why not? It’s the holidays, after all.) The French, of course, lay claim to the creation of the bûche de noël as we know it today. But it belongs to everyone.
Our bûche recipe wraps a cocoa sponge cake, as supple as a yoga mat, around an espresso-infused mascarpone filling with the just the right degree of sweetness. The sponge is completely fat-free but its flavor is satisfyingly chocolatey and its texture moist and tender. Dark chocolate ganache with a soupçon of Cognac enrobes the roulade, its consistency ideal for grafting branches and etching a wood-grain design.
Baking Notes
A bûche de noël, no matter how simple, requires some preparation, but it can be divided into manageable parts. And the cake, when iced with ganache, will hold nicely in a cool, dry place for up to 5 hours (dust on the sugar snow only just before serving). If you’re making Meringue Mushrooms for decoration, bake and assemble them a day or two in advance (make sure to store them in an airtight container—ideally with some silica packets for company). The filling can also be made a day ahead.
A cold frosted cake is not a fun cake to eat. Sure, after dinner, throw what’s left of the festive log in the fridge with other leftovers, but for its initial presentation and pleasure, please allow the cake to remain at room temperature. You’ve got 5 hours to finish dinner and serve dessert. No harm, no fowl, right?
Timing is crucial when combining ingredients for the sponge. The goal is to have the beaten yolks and whites ready at about the same time so neither waits, otherwise the acid in the cocoa is prone to deflate the eggs.
equipment mise en place
For the filling, you will need a digital kitchen scale, a small bowl, a mortar and pestle (or a cast-iron skillet), a small saucepan, a stand mixer fitted with the whisk attachment, a fine-mesh strainer, and an airtight container for storage.
For the roulade, you will need a digital kitchen scale, an 18 by 13-inch rimmed baking sheet; parchment paper; two small bowls; a fine-mesh strainer; a silicone spatula; a stand mixer fitted with the whisk attachment; a large sparkling-clean mixing bowl; a handheld mixer with perfectly clean beaters; a balloon whisk; an offset icing spatula; two clean, lint-free kitchen towels; and a paring knife.
For the ganache, you will need a digital kitchen scale, a medium bowl, a small saucepan, a whisk, and a silicone spatula.
To fill and finish the bûche, you will need parchment paper, a silicone spatula, a serrated knife, a small offset icing spatula, a fork, a metal skewer or toothpick, and a fine-mesh sieve.
-
for the espresso-mascarpone filling:
-
1gelatin sheet
-
0.5ounce espresso beans
-
4ounces cold heavy cream
-
8ounces mascarpone cheese
-
2ounces confectioners’ sugar
-
½teaspoon vanilla extract
-
Pinch of fine sea salt
-
-
for the chocolate roulade:
-
1ounce unsweetened Dutch-processed cocoa powder, plus 2 tablespoons for dusting
-
2ounces spring or filtered water
-
1teaspoon vanilla extract
-
¼teaspoon fine sea salt
-
2
-
3ounces egg yolk plus 5 ounces egg white (from 5 large eggs)
-
2ounces plus 1.5 ounces superfine sugar
-
⅛teaspoon cream of tartar
-
-
for the ganache:
-
4ounces heavy cream
-
1.25ounces unsalted European-style butter
-
4ounces good-quality semi-sweet chocolate (about 62 percent cocoa solids), chopped
-
2teaspoons Cognac
-
-
for finishing the bûche:
-
Confectioners’ sugar, for dusting
-
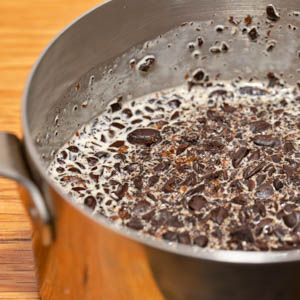
Make the filling: Fill a small bowl with water, then submerge the gelatin sheet; set aside. In a mortar with a pestle, coarsely crush the espresso beans (alternatively, use the bottom of a cast-iron skillet to crush the beans against the counter). In a small saucepan, bring 2 ounces of the cream to a simmer over low heat. Remove from the burner and stir in the espresso (fig. 1.1). Lift the gelatin sheet from the water, squeeze out the excess moisture, and add it to the cream mixture. Stir until the gelatin dissolves, then let cool until the cream mixture is barely warm.
-
In the bowl of a stand mixer fitted with the whisk attachment, combine the mascarpone, the remaining 2 ounces cream, the confectioners’ sugar, vanilla, and salt. Pour the cooled espresso cream through a fine-mesh sieve set over the mixer bowl; press on the solids in the sieve to extract as much liquid as possible. Beat on medium speed until the cream is lofted and holds soft peaks, about 3 minutes, scraping down the bowl as needed. Transfer to an airtight container and refrigerate until ready to use.
-
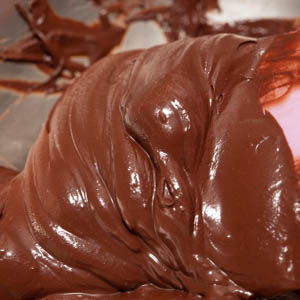
Make the roulade: Adjust an oven rack to the middle position and heat the oven 425 degrees. Spray an 18 by 13-inch rimmed baking sheet with nonstick cooking spray, line the bottom with parchment paper, and spray the parchment. Using a fine-mesh strainer, sift the 1 ounce of cocoa into a small bowl, add the water, and stir with a silicone spatula to form a thick paste (fig. 3.1). Add the vanilla and salt, then stir to incorporate; set aside. Sift the flour into a small bowl and set aside.
-
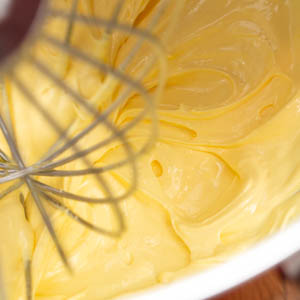
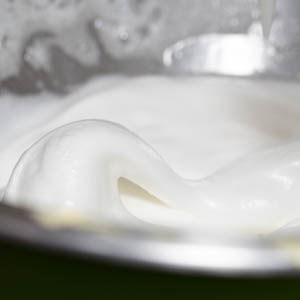
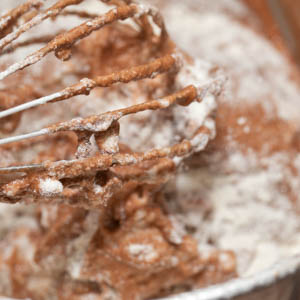
Turn the yolks into the bowl of a stand mixer fitted with the whisk attachment and the whites into a large sparkling-clean mixing bowl. Attach perfectly clean beaters to a handheld mixer and have it ready to take on the whites. To the yolks, add the 2 ounces superfine sugar and beat on medium-high speed, scraping down the bowl once or twice with a silicone spatula, until the mixture is thick (fig. 4.1) and forms a heavy ribbon when the whisk is lifted, about 6 minutes. Four minutes into beating the yolks, begin beating the whites with the handheld mixer on medium speed until foamy and beginning to show a bit of structure, about 30 seconds. Add the cream of tartar, then increase the speed to medium-high. With the mixer running, gradually sprinkle in the remaining 1.5 ounces superfine sugar and beat until the whites hold soft peaks, about 1 minute longer (fig. 4.2); do not overbeat. The goal is to have the yolks and whites ready at about the same time so neither waits for the other. Detach the bowl from the mixer, add the cocoa paste to the yolk mixture and fold with the spatula until combined. Working quickly, scrape the beaten whites into the mixer bowl, sift the flour on top, and fold swiftly but gently with a balloon whisk (fig. 4.3) just until the batter is uniform.
-
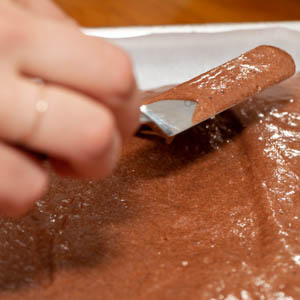
Pour the batter into the prepared baking sheet, then use an offset icing spatula to quickly spread it into an even layer (fig. 5.1). Bake until the center of the cake feels bouncy and springs back when lightly pressed with a fingertip, about 6 minutes; do not overbake. While the cake bakes, lay a clean lint-free kitchen towel on your work surface with the long side parallel to the counter’s edge. Sift the remaining 2 tablespoons cocoa onto the towel in an even layer.
-
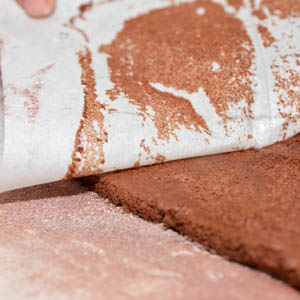
When the cake is done, let it cool for 1 minute; the edges will shrink slightly from the sides. Run a paring knife around the inside edges of the baking sheet to loosen the cake, then immediately invert the baking sheet onto the prepared kitchen towel. Lift off the baking sheet and carefully peel away the parchment (fig. 6.1). Cover the hot cake with a second lint-free kitchen towel, then let cool to room temperature, about 15 minutes. Uncover the cake and, starting at a long side, roll it up like a rug with the towel. Set aside while you make the ganache.
-
Make the ganache: Turn the chopped chocolate into a medium bowl. In a small saucepan, combine the cream and butter, then bring to a simmer over low heat, swirling the pan to melt the butter. Immediately pour the mixture over the chocolate and let stand for 5 minutes. Whisk gently until the mixture is smooth and shiny, then add the Cognac and whisk until combined. The ganache will be very fluid but will have some body. Let cool while you fill and trim the cake.
-
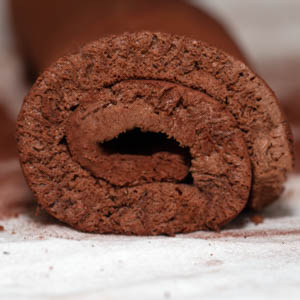
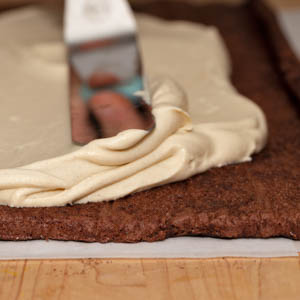
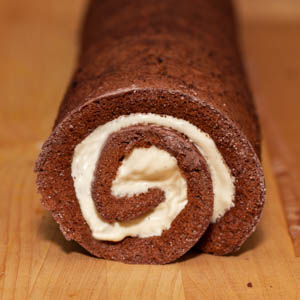
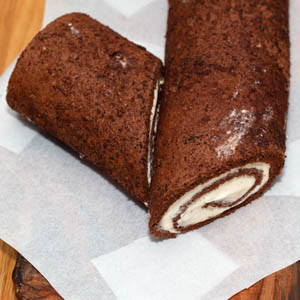
Fill and finish the bûche: Have ready a sheet of parchment about 13 by 18 inches in size. Carefully unroll the cake and loosely roll it back up without the towel (fig. 8.1). Transfer the cake to the parchment and unroll it. If the filling was made more than a few hours in advance, gently fold it with a silicone spatula to soften it. Spoon the filling onto the cake and, using an offset icing spatula, spread it into an even layer all the way to all the edges of the cake (fig. 8.2). Roll the cake back up into a neat, tight cylinder (fig. 8.3). Using a serrated knife, trim off about ⅜ inch from each end of the cake. To create the “branches,” cut off a section on the bias from each end of the roulade, one piece about 4 inches long and the other about 2 inches long; set both aside. Carefully transfer the roulade to a rimless serving platter or board.
-
Cut two strips of parchment paper, each about 2 inches longer than the roulade and 6 to 7 inches wide. Slip a strip under each side of the cake. Cut two 6 by 8-inch strips of parchment and tuck one under each cut end of the roulade. Before attaching the branches with ganache, determine the placement that is most visually pleasing to you. The branches should be positioned bias-cut side against the trunk and “growing” in the same direction; the larger piece should be attached to the side and the smaller one on top. Using a small spatula, spread a tablespoon or so of ganache on the bias-cut end of the larger branch (fig. 9.1), then attach it to the trunk, using the ganache as glue (fig. 9.2). Now spread a scant tablespoon of ganache on the bias-cut end of the smaller branch and attach it on top. The remaining ganache should still be pourable; if it is not, warm it briefly over a double boiler.
-
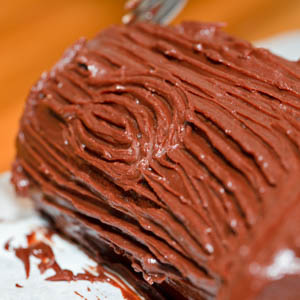
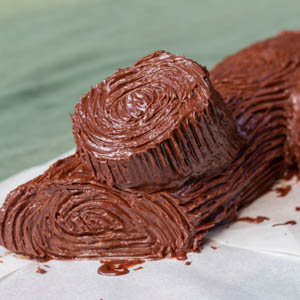
Drizzle about one-third of the remaining ganache onto the cake and, using a small offset icing spatula, spread it into a thin layer over the entire surface, including the cut ends, so that no parts are exposed; this is the “crumb coat.” Now pour the remaining ganache onto the cake and spread evenly over the entire surface. Lightly drag the tines of a fork through the ganache, taking care not to press too hard, to produce a wood-grain effect (fig. 10.1). If the ganache becomes too thick, warm the fork in hot water, then wipe it dry. Using the tip of a metal skewer or toothpick, create “growth rings” on the cut ends (fig. 10.2). Using the royal icing from the Meringue Mushrooms as glue, attach mushrooms in clusters on and around the bûche. The bûche will keep in a cool, dry spot for up to 5 hours. Just before serving, use a fine-mesh sieve to dust confectioners’ sugar on the cake to resemble snow. Carefully remove the parchment strips.
-
-
1.1
-
-
-
3.1
-
-
-
4.1
-
4.2
-
4.3
-
-
-
5.1
-
-
-
6.1
-
-
-
8.1
-
8.2
-
8.3
-
-
-
9.1

-
9.2
-
-
-
10.1
-
10.2
-
recipe by Nina Levin