World Class Chicken Pot Pie
introduction
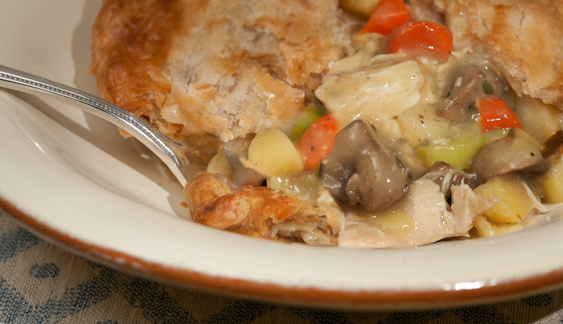
Chicken pot pie has no negative introjects. Warm, luscious, buttery, crisp, and satisfying as only pastry crowning a rich, hearty stew can be, our memories of potpies are held in a fuzzy, protective penumbra that goes straight back to childhood: to the grade school cafeteria, to Grandmother’s kitchen, to the take-out pie shop. Some of the actual pies of our childhood might have been pretty awful. But they possessed the comfort quotient—and something else most contemporary potpies have lost: a bottom. Today, when your fork plumbs the depths of a silky potpie filling, it clatters into metal or porcelain—not into a lush, upholstered bottom crust. There’s a phrase for this kind of compromise and it begins with the word “half.” A pie, by definition, does not always have a top crust, but it always has a bottom.
We’re taking the long way home with this recipe—which is the only way chicken potpie becomes truly memorable—by making a classic velouté from rich chicken stock, Anson Mills pastry flour, and an aromatized bolt of white vermouth. The filling’s attendant vegetables are roasted if they benefit from dry heat, while those that favor moist heat, are not. The poached chicken, which has been taken from the bones just as it was done and not hours later, remains silky and moist. The pies have both top and bottom crusts, sublimely flaky and flavorful.
If we wanted someone to fall in love with us, we would bake that person a stout, handsome little pie with an elegant filling and a crust like this one. These pies are also very pleasing dinner party fare.
Hey, so listen, we failed to mention one important aspect of this recipe: where we use fat, we use chicken fat. Schmaltz. It is animal fat, yes. It is saturated, yes. But it brings sublime chicken flavor to the velouté. Schmaltz is the thing that will make your pie filling unforgettable. If you cannot bear to use chicken fat, fine. Use olive oil.
Baking Notes
Try to avoid over-the-hill root vegetables with thick waistlines and weathered skins. Go for the slim, youthful diameter in carrots, parsnips, and leeks. Not only will the vegetables look prettier, but they will likely be sweeter and more tender, too.
We prefer individual pies because they are neat and tidy to serve, and because everyone gets the same amount of crust and filling. No landslide to fret over where the crust slides off sideways and some hapless soul gets only filling, and so on. We purchased a number of different individual forms for our baking trials, including some made of porcelain and some of cast iron. But our favorite by far were simple, inexpensive 4¼-inch miniature pie tins. In these molds, the bottom crust bakes perfectly and the pie is deep enough to accommodate a full cup of filling. Plus, the whole finished pie can be lifted out and served all of a piece, looking gorgeous. Made by Fox Run, these pie tins are available in many hardware stores, including ACE Hardware.
We were frankly thrilled to find a 6-inch Ateco cookie cutter that happens to be the perfect diameter for both top and bottom crusts. It has a thin, sharp cutting blade and performs its job perfectly. This super-sized cutter is available online through Amazon.com.
You will note that the bottom crusts are completely baked—or “blind baked”—before they are filled and covered with the top crust. The one thing to remember when working with baked and unbaked pastry together is that the bottom crusts must still be slightly warm in order to give purchase to the unbaked top crusts. We use an egg wash around the perimeter of the bottom crusts to assist in that process.
To blind bake the bottom crusts, we divide the eight pie pans between two baking sheets and bake them all at the same time on different oven racks to give them adequate airflow. Once filled, however, we found it prudent to bake the pot pies only four at a time in two separate batches because the two-rack strategy that worked for blind baking proved clumsy and difficult. The pot pies can be baked several hours in advance and reheated for service with no loss of quality. They freeze well, too.
If you wish to bake a single large pot pie, our recommendation would be to do so in a 9- or 10-inch cast-iron skillet, or one that can accommodate 2 quarts of filling. But we didn’t test it, and cannot offer details at this time, unfortunately.
To make these pies with leftover turkey, use identical proportions of meat, vegetables, flour, and stock.
Working Ahead
Plan to work with this recipe in stages. For instance, if you cook the chicken, pick the meat from the bones and simmer the stock on the first day, the second day’s velouté will be quite manageable. Similarly, if you may make the pastry on the day you cook the chicken, roll it out, stamp it into rounds and freeze the rounds overnight between parchment layers, putting the pies together on the second day will be manageable.
equipment mise en place
To cook the chicken and make the stock, you will need a heavy-bottomed, 5- to 6-quart stockpot; a pair of tongs; a rimmed baking sheet; a fine-holed colander or chinois; a large mixing bowl; and a wooden spoon.
To make the pot pie filling, you will need a medium saucepan, a roasting pan, a large Dutch oven, a wooden spoon, a couple of mixing bowls, a slotted spoon, a ladle, and a whisk.
To roll out the dough and bake the pot pies, you will need two large rimmed baking sheets; eight 4¼-inch round, 1-inch-deep individual pie pans or other similarly sized individual molds; a rolling pin; a ruler; a 6-inch round cutter; a wooden toothpick or skewer; eight 6-inch squares of aluminum foil; 3 pounds of dried beans for blind baking; two small bowls; a tea strainer; a pastry brush; and a pair of kitchen shears.
-
for the chicken and chicken stock:
-
1whole chicken, about 4 pounds, washed, liver and gizzard reserved for another use, neck, if present, along for the ride
-
2medium yellow onions, diced
-
1large or 2 small or carrots, peeled and chopped into ½-inch lengths
-
1celery rib, chopped into ½-inch lengths
-
4garlic cloves, peeled
-
6large sprigs fresh thyme or 1½ teaspoons dried thyme
-
1Turkish bay leaf
-
Handful of fresh parsley stems
-
12cups spring or filtered water
-
Fine sea salt and freshly ground black pepper
-
-
for the filling:
-
3slender parsnips (8 to 9 ounces total weight), peeled, straggly rattails snipped off, and parsnips cut into ½-inch rounds (about 1¼ cups)
-
3slender carrots (8 to 9 ounces total weight), peeled and cut into ½-inch rounds (about 1¼ cups)
-
Schmaltz (chicken fat) skimmed from the chicken stock
-
Unsalted butter, if needed
-
Fine sea salt and freshly ground black pepper
-
8ounces small button mushrooms, wiped clean, stems trimmed, and quartered (about 2 cups)
-
4slender leeks (about 10 ounces total weight), cleaned well, white and light green part sliced into rounds (about 2 cups)
-
4ounces (about ¾ sifted cup) Anson Mills Colonial Style Fine Cloth-Bolted Pastry Flour, sifted
-
½cup dry vermouth
-
2teaspoons minced fresh thyme
-
-
for the pastry:
-
3tablespoons softened butter for greasing the molds
-
1recipe Flaky Lard and Butter Pastry, chilled
-
1large egg
-
2teaspoons water
-
-
Cook the chicken and make the stock: Combine the chicken neck (if using), the onions, carrots, celery, garlic, thyme, bay leaf, parsley stems, and water in a heavy-bottomed, 5- to 6-quart stockpot. Place the chicken breast up in the pot and bring the liquid to a simmer over medium-high heat. Reduce the heat to low, cover the pot, and simmer gently until the chicken legs pull easily from the carcass, about 1 hour. Remove from the heat and let cool at room temperature for 20 minutes.
-
Using tongs, transfer the chicken from the pot to a rimmed baking sheet. When it is cool enough to handle, pull the meat from the bones and chop it into pieces that fit on a spoon. You should have about 1¼ pounds of meat, or slightly more. Season the chicken with salt and pepper while it is still warm. Cover and refrigerate. Return the bones to the stockpot, bring the stock to a simmer over medium heat, and simmer gently until it is rich, flavorful, and reduced to a generous 7 cups—about 1 hour. Strain the stock through a fine-holed colander or chinois into a large mixing bowl. Let it cool, cover, and then refrigerate overnight.
-
Reduce the stock: Lift the congealed fat—or schmaltz—from the top of the stock with a spoon; some stock will cling to the schmaltz, but this is fine. There will be anywhere from 6 to 10 tablespoons of schmaltz, depending on the chicken. Set it aside. Pour the stock into a medium saucepan and bring it to a simmer over medium-high heat. Simmer for about 15 minutes, until 6 cups of stock remain. Remove from the heat and cover to keep hot.
-
Make the filling: Adjust an oven rack to the middle position, set a roasting pan on the rack, and heat the oven to 475 degrees. Toss together the parsnips and carrots in a mixing bowl. Melt ½ cup of the schmaltz (if you do not have ½ cup of schmaltz, make up the difference with butter) over low heat in a Dutch oven, and then remove the pot from the heat. Spoon 1½ tablespoons of the melted fat onto the vegetables, sprinkle them with ¼ teaspoon salt and several grinds of pepper, and toss to combine. Roast the vegetables, tossing occasionally, until they are just softened and have begun to color, 15 to 20 minutes, depending on their size. While they are roasting, toss the mushrooms in a bowl with 1½ tablespoons schmaltz, ¼ teaspoon salt, and several grinds of pepper. When the parsnips and carrots are done, transfer them to a mixing bowl, and then turn the mushrooms into the roasting pan. Roast the mushrooms, tossing occasionally, until they lose their juices and begin to color, about 10 minutes. Transfer the mushrooms to the bowl with the parsnips and carrots.
-
There should be 4 to 5 tablespoons of schmaltz remaining in the Dutch oven. Add the leeks to the Dutch oven and cook, covered, over low heat, stirring occasionally, until the leeks are softened, about 5 minutes. Transfer the leeks to a bowl with a slotted spoon, leaving the schmaltz in the Dutch oven. Stir the flour into the pot with a wooden spoon; if there is not enough fat to coat the flour and form a nice roux, add an additional tablespoon or so of schmaltz or butter. Cook, stirring, until the flour is golden, about 3 minutes. Add a ladle of hot chicken stock to the roux and whisk vigorously. It will thicken quickly. Add the remaining hot stock, whisking constantly to prevent lumps. Stir in the vermouth. Season with 1 to 1¼ teaspoons salt and at least ½ teaspoon pepper and simmer gently for 5 minutes. Return the leeks to the pot, and then add the reserved chicken meat, the roasted vegetables, and the thyme. Taste for seasoning. Set the filling aside or let it cool, cover, and refrigerate overnight.
-
Roll out the pastry bottoms and line the pans: Clear some space in your refrigerator and set a rimmed baking sheet on a shelf. Grease eight 4¼-inch pie pans with a 1-inch depth or similarly sized molds with the softened butter and set them aside.
-
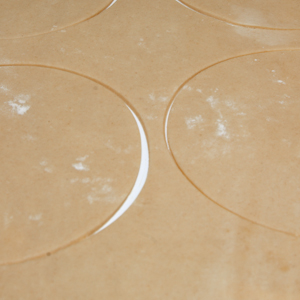
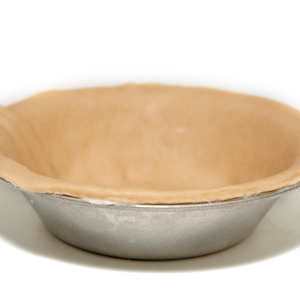
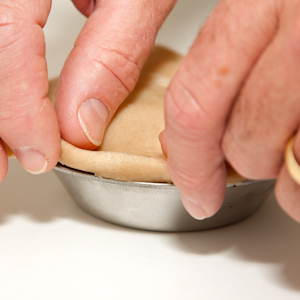
Remove the dough from the refrigerator and whack it sharply with a rolling pin to flatten it slightly. Cut the dough in half and return one half to the refrigerator. Roll out the other half on a lightly floured work surface into a 12-inch square, taking care to roll evenly from the center to the edges of the dough. With a 6-inch round cutter, stamp out 4 rounds of dough (fig. 7.1) and fit them snugly into the greased pans (fig. 7.2). If the dough balloons out, prick it with a toothpick or wooden skewer. Work quickly so the dough does not become warm. Set the dough-lined pans on the baking sheet in the refrigerator. Gather up the dough, lightly flour the work surface, and roll out the dough. Stamp out 3 more rounds and fit them into 3 pans. Roll out the last bit of dough, stamp out a final round, and line the last pan. Set them in the refrigerator with the first four.
-
Roll out the pastry tops: Remove the second piece of dough from the refrigerator and repeat the process described in Step 7 to roll and stamp out the eight 6-inch rounds that will become the top crusts of the pot pies. Stack the rounds between pieces of parchment or plastic wrap and refrigerate them.
-
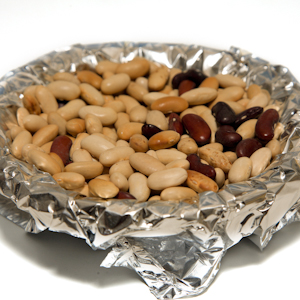
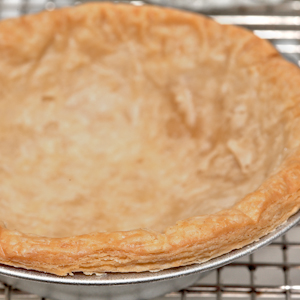
Blind bake the bottoms: Adjust the oven racks to the lower- and upper-middle positions and heat the oven to 400 degrees. Line each chilled dough-lined pan with a 6-inch square of aluminum foil and fill with about 1 cup of dried beans (fig. 9.1). Arrange 4 pans on each of 2 baking sheets. Bake for 15 minutes, rotating the baking sheets front to back and top to bottom halfway through. Remove the baking sheets from the oven and gently lift out the aluminum foil and beans (fig. 9.2). Position an oven rack in the middle of the oven. Leave the oven on.
-
While the bottom crusts are baking, return the filling to the stove and heat it over low heat until warmed through.
-
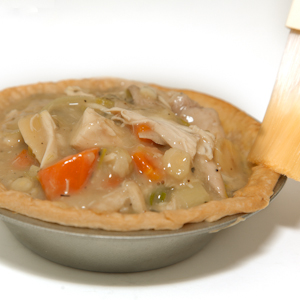
Fill and bake the pies: Beat the egg and water in a small bowl, and then pour the mixture through a tea strainer into a second small bowl. Fill each of 4 still-warm bottom crusts with 1 cup of filling and brush the edges of the dough with egg wash (fig. 11.1). Place a round of dough over the top of each pie and roll the edges under slightly to meet the edges of the bottom crust (fig. 11.2). Crimp the edge (fig. 11.3). Brush the top crusts with egg wash and, using kitchen shears, snip a vent into the top of each pie (fig. 11.4). Arrange the 4 filled pies on a rimmed baking sheet. Return the unfilled bottom crusts to the oven for 30 seconds to warm them. Bake the filled pies until the tops are golden brown and the filling is hot, about 15 minutes. While the first 4 pies are baking, fill and top the remaining 4 pies. When the first 4 pies are finished, remove them from the oven and bake the second set of pies. Let the baked pies cool in their pans for 10 minutes, then gently lift the pot pies from the pans and set them in individual serving bowls. The first set of pies may be rewarmed briefly after the second set comes out of the oven, or they may all be baked in advance and rewarmed.
-
-
7.1
-
7.2
-
-
-
9.1
-
9.2
-
-
-
11.1
-
11.2
-
11.3

-
11.4

-