Essential All-Butter Pastry 2.1
introduction
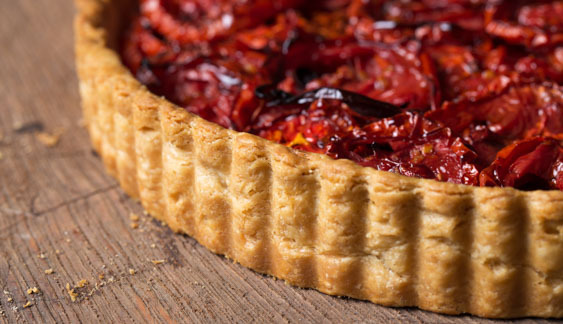
A flaky, buttery pie crust with a proud fluted edge ranks among any baker’s most prized achievements. We happen to think our flour excels at producing a pastry whose flavor and performance rivals a pie great grandmother might have made. Our flours perform like those of great grandmother’s era, also, requiring ratios different from modern flour. When working with Anson Mills’ quirky heirlooms, we often seek counsel from Rose Levy Beranbaum’s recipes, knowing that modern versus heirloom distinctions notwithstanding, her techniques will be sound and well researched. When we saw Rose’s basic pastry formula skip right past the flouncing and messy fraisage handwork and straight into the food processor, we were intrigued. We knew she must suggest this to keep the butter cold and the manual manipulation brief—and when we tested this technique with Anson Mills flour and custom proportions, we were rewarded with a gorgeous product.
Ah, but practice makes perfect. More recently, while developing the recipe for Double-Crust Apple Slab Pie, we added a percentage of French Mediterranean White Bread Flour to the existing formula. It beefed up the structure of the crust, providing a small but crucial improvement. Welcome to 2.1. You’ll appreciate the difference.
Baking Notes
European-style butter, which has a higher fat percentage than average butter is absolutely essential to the success of this recipe.
This recipe does require freezing and processing the butter in two batches—but it’s neat and clean. The first round of butter is run with the flour to a fine pebbly particle size; the second round is pulsed to larger chunks. Ice water goes right down the tube as the machine runs. This dough will not chase itself around the blade. Rather, it remains relatively dry, succumbing to pressure from a squeeze in the fist. You will actually be able to grasp when the dough has acquired sufficient moisture. If the dough does not hold together, toss in additional ice water, drop by drop. Weather, time of year, the condition of your flour—these are all factors that can influence hydration requirements. Once rested, the dough will be completely hydrated.
Roll the dough out when it is malleable, but still very chilled, between sheets of parchment paper. Use as little additional flour as possible.
A pizza stone or baking steel will produce a superior bottom crust. Please use one for best results.
-
-
4.5ounces cold unsalted European-style butter, cut into ½-inch cubes
-
A handful of ice cubes
-
Spring or filtered water
-
5.5ounces Anson Mills Colonial Style Fine Cloth-Bolted Pastry Flour, frozen, plus additional for rolling out the dough
-
1ounce Anson Mills French Mediterranean White Bread Flour, frozen
-
Scant ½ teaspoon fine sea salt
-
-
Divide the butter between two small bowls, one with 2.5 ounces of butter, the other with 2 ounces. Cover each bowl with plastic wrap and place them in the freezer for 30 minutes.
-
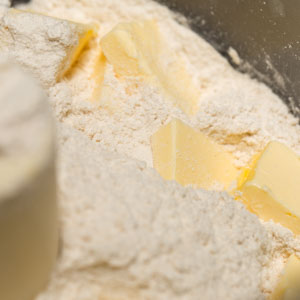
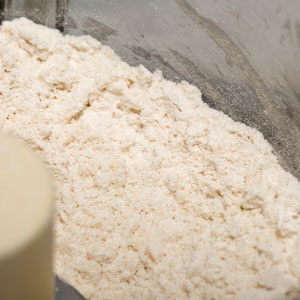
When the butter is frozen, drop the ice cubes into a liquid measuring cup, fill the cup with water, and set it aside. In a food processor, pulse the flours and salt a couple of times to combine. Scatter the larger amount of chilled butter over the flour mixture and pulse until the butter pieces are fine-ish and the mixture looks pebbly, about ten 1-second pulses. Scatter the remaining butter over the flour-butter mixture (fig. 2.1) and pulse until the butter is combined but still bears ¼-inch chunks, about five 1-second pulses. Set a second liquid measuring cup on a digital kitchen scale, tare the scale, and weigh out 2 ounces of ice water, taking only the water and none of the ice; reserve the remaining ice water. With the machine running, pour the ice water through the feed tube and process for just 2 to 3 seconds more. The crumbs will look fine and granular and the butter will be in fine bits, but the mixture will not have come together into a cohesive dough.
-
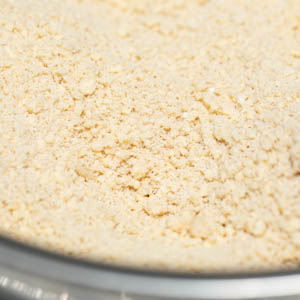
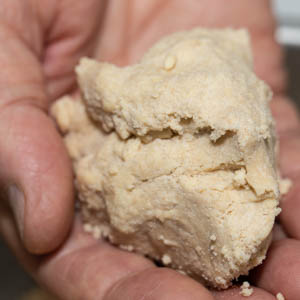
Turn the contents of the food processor into a large bowl (fig. 3.1) and squeeze some of the crumbs in your palm—they should hold together but not feel damp (fig. 3.2). If they do not hold together, sprinkle on a drop or two more of ice water over and fluff the mixture with your fingers to incorporate. Test the mixture once again and fluff in additional water, if needed—but no more than 1 teaspoon additional water should be required.
-
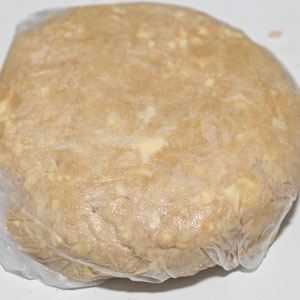
Lay a large sheet of plastic wrap on the counter. With the dough mixture still in the bowl, use your hands to squeeze it into a mound. Set the mound on the plastic wrap, leaving the crumbs and bits behind. Press and squeeze the mound into a compact disk, adding and pressing the crumbs into the mass. Wrap tightly in the plastic wrap (fig. 4.1), then refrigerate for at least 2 hours or up to overnight.
-
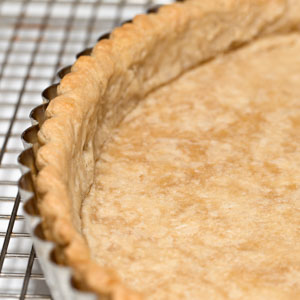
Unwrap the dough, place it on a lightly floured sheet of parchment paper and flour the dough lightly. Pound it with a rolling pin to flatten it slightly, retaining its shape. Lay a second parchment sheet on top. Using the rolling pin, roll out the dough to a 12-inch round, occasionally flipping it in its parchment sandwich and lifting the paper to prevent the dough from sticking. Lightly flour the rolling pin, wrap the dough around it, then unroll the dough onto a 9-inch pie pan or a 9- to 10-inch tart pan with a removable bottom. Lift the edges of the dough and ease it into the corners of the pan. If using a pie pan, trim the edges, then crimp or flute them; if using a tart pan, gently press the dough into the fluted sides of the pan, then use a paring knife to trim the excess dough so that the edge is flush with the rim of the pan. With a fork, poke evenly spaced sets of holes in the bottom of the dough. Refrigerate the dough-lined pan until the dough is firm, at least 1 hour or up to 2 hours. Adjust an oven rack to the lowest position. Place a pizza stone or baking steel on the rack and heat the oven to 400 degrees; allow the stone or steel to heat for at least 1 hour.
-
Line the chilled dough-lined pan with a sheet of aluminum foil, allowing ample overhang. Pour 2 to 3 cups of pie weights into the foil. Slide the pan directly onto the pizza stone and bake for 25 minutes. Carefully remove the pan from the oven, lift out the foil and weights (fig. 6.1), and return the pan to the pizza stone. Continue to bake until the pastry is set and golden brown, about 5 minutes.
-
-
2.1
-
2.2
-
-
-
3.1
-
3.2
-
-
-
4.1
-
-
-
6.1
-