Berry-Filled Hand Pies
introduction
Hey, hand pie, why aren’t you just a turnover? Or a pasty? Oh, right, it’s because you’re from the South and that’s what they call you down there. Not to trivialize historically significant distinctions between one portable pie and another, but fillings fall in love with flaky pastry on a daily basis and have for centuries the world over. Some have sweet fillings, some savory. Some are fashioned from hot water pastry, others from simple buttery pie dough. The pastry we chose is laminated, making these hand pies something more akin to Yankee turnovers—but does anyone really care? The form is ancient, the concept is solid, and these hand pies are great.
Baking Notes
Keep the dough very cold, but tempered slightly, while rolling, sectioning, and forming the pies. We’ve also found the jam or preserves more easily managed if half frozen and chewy-cold. When forming the pies, avoid filling run-off by pushing the jam to the center and pressing out the air around them, then firmly seal the raw edges by folding and crimping them.
The baked pies reheat like a dream in a 350-degree oven for 8 to 10 minutes. They also freeze raw and bake beautifully straight out of the freezer (add a few minutes to the baking time).
equipment mise en place
For this recipe, you will need parchment paper, a rolling pin, two baking sheets, a pizza wheel, a ruler, a small bowl, a whisk, a sharp paring knife, and a pastry brush.
-
-
1recipe Rough Puff Pastry
-
8ounces Quick Strawberry Jam or Quick Blueberry Preserves, well-chilled or half frozen
-
1large egg
-
1teaspoon spring or filtered water
-
-
Cut four 12 by 18-inch sheets of parchment paper. Remove the dough from the refrigerator, unwrap it, and cut it in half. Rewrap one half and return it to the refrigerator. Lay a sheet of parchment on the counter, sprinkle it lightly with flour, and place the working block of dough in the center. Dust the top lightly with flour and lay a second sheet of parchment over it. Allow the dough to rest for about 5 minutes.
-
Using a rolling pin, roll the dough into a 11-inch square, rotating the paper to maintain even thickness and proportion. Occasionally as needed, peel off the top parchment, dust the dough with flour, and replace the parchment; flip the package and dust the second side of the dough in the same way. Slide the dough square, still between the parchment, onto a baking sheet and refrigerate. Using the remaining two parchment sheets, roll out the second block of dough in the same way, then refrigerate on a second baking sheet.
-
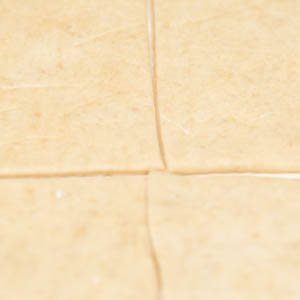
Working again with the first piece of dough, slide the dough on the parchment onto a work surface and peel off the top sheet. Using a ruler and a pizza wheel, trim the edges to form a tidy 10-inch square; peel away the trimmings. Now cut the square into four 5-inch squares (fig. 3.1), replace the top parchment, slide the package back onto the baking sheet, and refrigerate. Repeat with the second piece of dough and refrigerate.
-
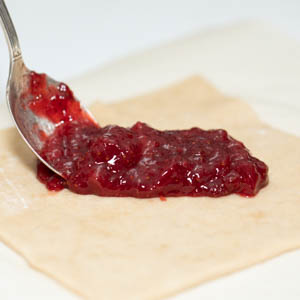
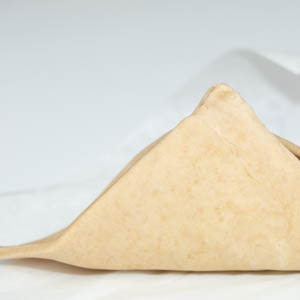
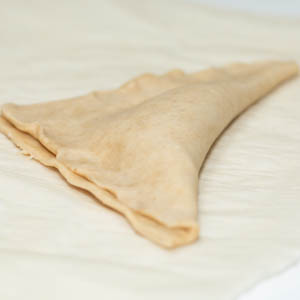
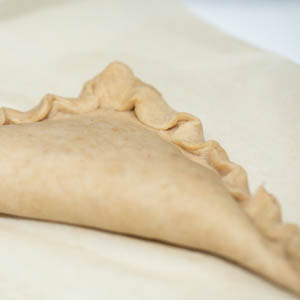
Remove the first set of dough squares from the refrigerator, loosen one square from the parchment, and rotate it a so a point is nearest you. Spoon 1 ounce of jam in the center of the square (fig. 4.1); avoid spooning it too close to the edges and points of the square. Lift the top and bottom points and bring them together, creating a triangle that is standing on its hypotenuse (fig. 4.2). Pinch the edges to seal. Lay the triangle down and encase the filling in a snug mound at the center along the hypotenuse by gently pressing out the air around it (fig. 4.3). Press the raw edges to seal, fold about ¼ inch of the edge up and over itself, and crimp firmly (fig. 4.4). Place the filled pastry back on the baking sheet. Fill the remaining dough squares in the same way, then return the baking sheet to the refrigerator. Fill the second set of dough squares in the same way, then refrigerate.
-
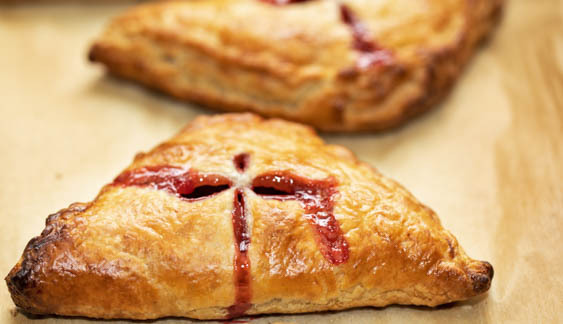
Adjust a rack to the lower-middle position and heat the oven to 400 degrees with the convection function or to 425 degrees if using a conventional oven. In a small bowl, whisk together the egg and water; set aside. Remove the first baking sheet from the refrigerator. Using a sharp paring knife, cut a few small vents in the center of each pie, then brush the pies lightly with egg wash. Bake until golden brown on top and the filling bubbles out the vents (fig. 5.1), about 20 minutes. Let cool on the baking sheet on a wire rack for about 10 minutes, then transfer the pies directly to the rack. Vent, brush, bake and cool the second baking sheetful of pies in the same way. Serve warm.
-
-
3.1
-
-
-
4.1
-
4.2
-
4.3
-
4.4
-
-
-
5.1

-