Pineapple Pie
introduction
The pleasures of pineapple pie were not among those we knew intimately or, frankly, ever contemplated until our friend John announced plans to make every recipe archived in his late grandmother’s handwritten collection. Third in succession—after an elaborately molded affair involving lime Jell-O and pears followed by a date-nut cake with penuche icing—came pineapple pie. John is a person for whom an impulse is articulated in terms so urgent that it becomes a swirling current into which you, too, are swept and persuaded. (He can pitch a Miele product with more supporting detail than anyone at Miele headquarters.) Our grandmother certainly never made pineapple pie, but suddenly, John’s grandmother’s filling, having slipped from a can and bloop-blooping fragrantly in a saucepan on his stove, became our idée fixe.
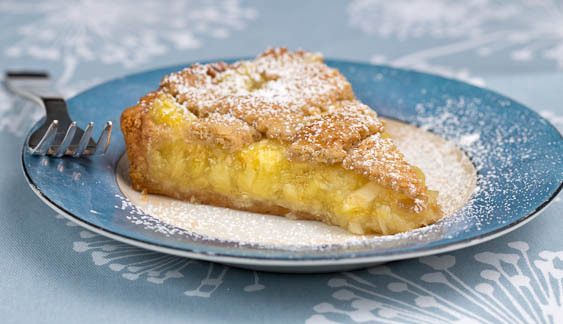
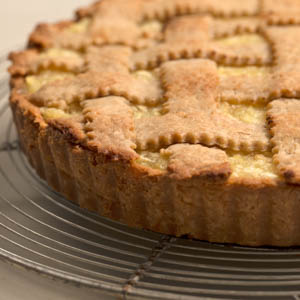
The finished pie, which John brought over on a pretty plate, did not disappoint. Sure, we wanted fresh pineapple and our own favorite pastry, a lattice instead of a double crust to show off the jeweled tones, but the filling was silky on the tongue with an edge of tartness that ran along the sides, and velvety in the style of a first-rate apple pie. But instead of encountering apple, of course, we met a thrilling explosion of pineapple flavor caught between layers of crisp short pastry, a touch of old-fashioned Americana in its bearing.
This is a great all-season companion that keeps and travels beautifully. Do not think for a moment that the expanse of text below suggests difficulty: it is just a nice, simple pie trapped in a long recipe.
Thanks, John. Now show us that recipe for penuche icing.
Baking Notes
Ripe pineapples are important for this recipe. Sources say that for pineapples, ripening halts the moment the fruit is harvested, so select carefully at the store. Some folks recommend tugging at the uppermost leaves—if they come out easily, the fruit is ripe, they say. We think a better way to judge ripeness is to put your nose to the pineapple. If its aroma is strong, luscious, and sugary, you know you have a good one. But also check for bruises and blemishes—even with their heavy armor, pineapples are not impervious to rough treatment. Ripeness notwithstanding, we discovered substantial variance in pineapple sweetness and juiciness. As a result, we offer a range in sugar and cornstarch amounts. Begin with the lower amounts of each. If, after cooking the filling, it is looser than a thick marmalade or less sweet than you’d like, stir the additional 1 tablespoon of cornstarch and 2 additional tablespoons of sugar into the filling while it is still hot and on the stove. Return the filling to a simmer and allow it to thicken further. Remove from the heat and let cool completely before adding it to the prebaked tart shell.
The filling should be level with the top of the tart pan to keep the filling from over flowing (if the filling is too high), or the lattice strips from sinking (if the filling is too low).
equipment mise en place
To make the pastry, you will need a digital kitchen scale, two small bowls, two liquid measuring cups, a food processor, a large bowl (if the dough requires additional water), parchment paper, a rolling pin, a ruler, a 9-inch round by 1-inch deep tart pan with a removable bottom, a pizza stone, an icing spatula, a fluted pastry wheel, a baking sheet, heavy-duty aluminum foil, 3 or 4 cups of pie weights or dried beans, and a wire rack.
To make the filling and bake the pie, you will need a food processor, a heavy-bottomed medium saucepan, a small bowl and a medium bowl, a whisk, a small offset spatula, a baking sheet, a wire rack, a thin metal spatula, and a serving plate.
-
for the pastry:
-
7ounces cold unsalted European-style butter, cut into ½-inch cubes
-
10ounces Anson Mills Colonial Style Fine Cloth-Bolted Pastry Flour, frozen, plus additional for rolling out the dough
-
A handful of ice cubes
-
4 to 5ounces spring or filtered water
-
¾teaspoon fine sea salt
-
-
for the filling:
-
2ripe pineapples
-
1tablespoon juice from ½ large, juicy lemon
-
⅛teaspoon fine sea salt
-
3ounces sugar, plus an additional 2 tablespoons, if needed
-
1.3ounces cornstarch, plus an additional 1 tablespoon, if needed
-
-
Make the pastry: Divide the butter into 2 small bowls, one with 3 ounces of butter, the other with 4 ounces. Cover each bowl with plastic wrap and place them in the freezer for 30 minutes.
-
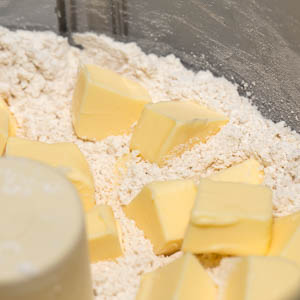
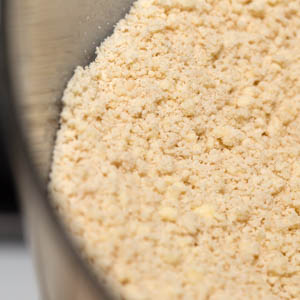
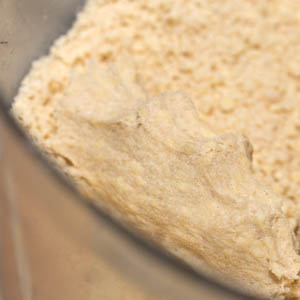
After the butter has chilled for 30 minutes, drop the ice cubes into a liquid measuring cup and fill the cup with the water; set aside to allow the water to chill. Meanwhile, turn the frozen flour into a food processor, add the salt, and pulse a couple of times to combine. Working quickly, set a second measuring cup on a digital kitchen scale, tare the scale, and pour in 2.5 ounces of ice water, taking only the water and none of the ice; set the remaining ice water aside. Scatter the larger amount of chilled butter over the flour in the food processor (fig. 2.1) and process until the butter pieces are fine-ish and the mixture looks rather pebbly (fig. 2.2), about ten 1-second pulses. Scatter the remaining butter over the mixture, and pulse until the second butter addition is mixed in but is still in large chunks, about five 1-second pulses. With the machine running, pour the ice water through the feed tube; once the water has been added, let the machine run for just 2 or 3 seconds more. The mixture will look fine and granular, and the butter will be in small bits, but it will not have come together into a cohesive dough. Squeeze a bit of it in your palm—it should hold together (fig. 2.3) and not crumble apart if pressed or prodded. If the dough does not hold together or if it crumbles easily, dump the mixture into a large bowl, sprinkle in an additional 1½ teaspoons or so of ice water, and fluff the mixture your fingers to incorporate the water. Test again by squeezing a bit of the dough. If needed, sprinkle and fluff in additional water; the dough should not require more than a total of 1½ tablespoons additional ice water.
-
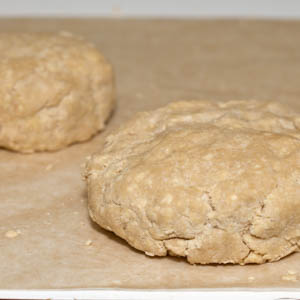
Lay two large sheets of plastic wrap on your work surface. Turn the dough particles onto the plastic, dividing it into two piles, one slightly larger than the other. Press and squeeze each pile into a compact mound, then flatten into a disk (fig. 3.1); the larger piece should weigh about 11 ounces and the smaller about 8.5 ounces. Wrap each disk tightly in the plastic and refrigerate for at least 8 hours, or up to overnight.
-
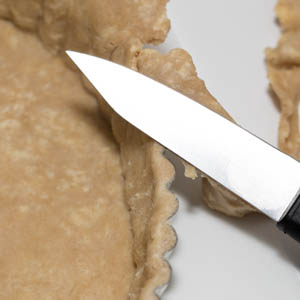
Unwrap the larger dough disk, place it on a lightly floured sheet of parchment paper, lightly flour the top of the dough, and pound it with a rolling pin to flatten it while retaining its round form. Place a second sheet of parchment on top. Using the rolling pin, roll out the dough to a 12-inch round, flipping it in its parchment sandwich as necessary and lifting the paper to prevent the dough from sticking. Lightly flour the rolling pin, wrap the dough around it, then unroll the dough onto a 9-inch round by 1-inch-deep tart pan with a removable bottom. Lift the edges of the dough and ease it into the corners of the pan. Gently press the dough into the fluted sides of the pan, then use a paring knife to trim the excess dough so that the edge is flush with the rim of the pan (fig. 4.1). Use a fork to poke evenly spaced sets of holes on bottom of the dough. Refrigerate the dough-lined pan until the dough is firm, at least 1 hour or up to 2 hours. Adjust one oven rack to the upper-middle position and the other rack to the lowest position. Place a pizza stone on the lower rack and heat the oven to 400 degrees; allow the pizza stone to heat for at least 1 hour.
-
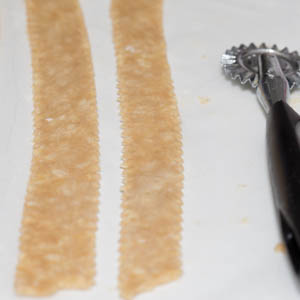
Unwrap the smaller dough disk and roll it out as you did the larger one, but to an 11-inch round. Remove the top sheet of parchment and slide an icing spatula under the round to make sure the dough is free from the paper, flouring lightly if necessary. Using a ruler and a fluted pastry wheel, cut the round into ¾-inch-wide strips (fig. 5.1). Cover with plastic wrap and slide the parchment-bearing strips onto a baking sheet and into the refrigerator.
-
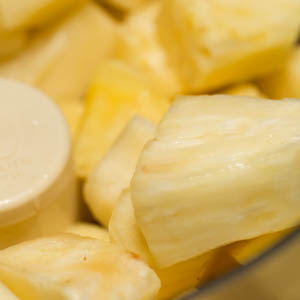
Prepare the filling: Working with one pineapple at a time, use a sharp chef’s knife to lob the top and base off the fruit. Stand the pineapple upright on the cutting board and use the knife to carve down from the top, following the contours of the fruit to remove the skin section by section. Trim away any eyes, then cut the pineapple lengthwise into quarters. Turn each quarter on a flat side and cut away the core; discard the cores. Cut each quadrant in half lengthwise into 2 wedges, then crosswise into ¾-inch pieces. Weigh out 2 pounds of pineapple pieces; use any remaining pineapple as you like.
-
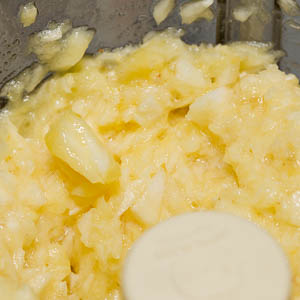
Turn the pineapple into a food processor (fig. 7.1) and pulse until broken down into bits slightly larger than canned crushed pineapple (fig. 7.2), about 16 quick pulses. Transfer to a heavy-bottomed medium saucepan and stir in the lemon juice and salt. In a small bowl, whisk together the cornstarch and sugar, then stir into the pineapple. Bring the mixture to a simmer over medium heat, stirring constantly as its temperature increases. When it reaches a simmer, it will begin to thicken; continue to cook for a few more seconds. If the filling has the consistency of a thick marmalade, remove the pan from the heat; if it is still runny, whisk in an additional 1 tablespoon cornstarch, return to a simmer over medium heat, and cook, stirring constantly, until thickened, about a few seconds more. Taste for sweetness, adding up to 2 tablespoons additional sugar if you like. Transfer the filling to a medium bowl and let cool to room temperature.
-
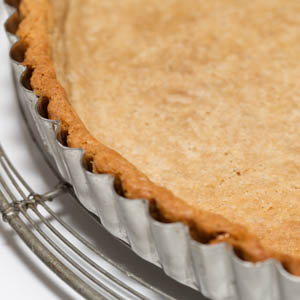
Prebake the pastry: Line the chilled bottom crust with a sheet of heavy-duty aluminum foil, fitting the foil into the corners. Pour in 4 cups of pie weights or dried beans. Place the tart pan directly on the pizza stone and bake for 25 minutes. Carefully remove the pan from the oven, lift out the foil and weights, and return the pan to the pizza stone. Continue to bake until the pastry is set and golden brown, about 5 minutes. Transfer to a wire rack (fig. 8.1) and let cool to room temperature.
-
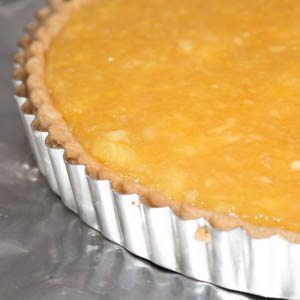
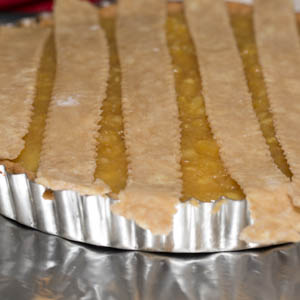
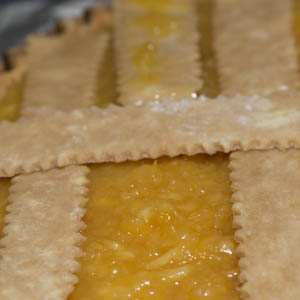
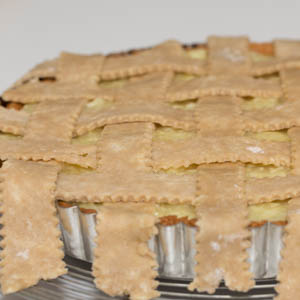
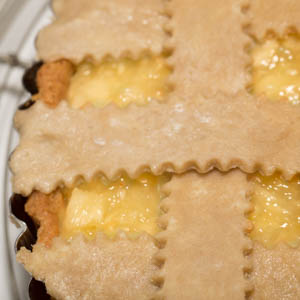
Fill and bake the pie: Spoon the cooled filling into the cooled tart shell, spreading it into the corners and smoothing the surface with a small offset spatula. The filling should be level with the edge of the tart shell, not mounded (fig. 9.1); if necessary, scoop out the excess and save it for another use. Remove the dough strips from the refrigerator and let them stand at room temperature for a few minutes, until pliable. Arrange 5 strips parallel to each other and evenly spaced across the filling, allowing the excess to hang over the side (fig. 9.2); use one of the longest strips in the center and shorter ones on the sides. Peel back one end of every other strip to the center of the pie. Place the longest strip remaining on the parchment across the center of the pie, perpendicular to the first set of strips (fig. 9.3), then unfold each peeled-back strip. Next, peel back the parallel strips that run underneath the single perpendicular strip. Place a second perpendicular strip alongside the first strip, maintaining the same spacing as the first set of strips, then unfold each peeled-back strip. Repeat these steps to form a woven pattern on one half of the pie, then do the same on the other half of the pie (fig. 9.4). Trim the lattice strips where they meet the edge of the tart pan (fig. 9.5).
-
Set the tart pan on a baking sheet and slide the baking sheet into the oven on the upper rack. Bake the pie until the filling is gently bubbling and the lattice is golden brown, about 30 minutes. Transfer the baking sheet to a wire rack and let cool to room temperature. Remove the outer ring from the tart pan. Slip a thin metal spatula between the tart pan bottom and the bottom of the crust, the slide the tart off the pan bottom (fig. 10.1).
-
-
2.1
-
2.2
-
2.3
-
-
-
3.1
-
-
-
4.1
-
-
-
5.1
-
-
-
7.1
-
7.2
-
-
-
8.1
-
-
-
9.1
-
9.2
-
9.3
-
9.4
-
9.5
-
-
-
10.1
-