Handmade Flour Tortillas
introduction
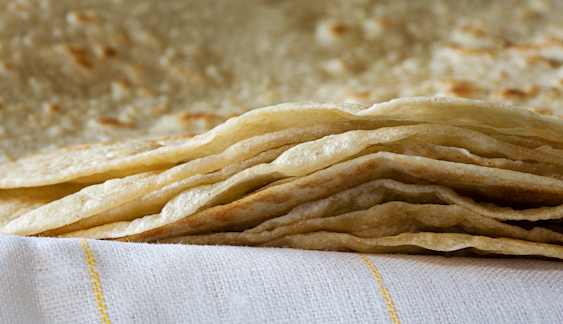
The divide between store-bought flour tortillas and flour tortillas made with Anson Mills Trigo Fuerte Flatbread Flour is nothing short of seismic. No stiff, leathery rounds here. These tortillas are supple, and in places where they aren’t supple, they’re crisp. Plus amazingly, brilliantly, they actually taste like real food, blooming with sweetness from their blended wheat varieties, and picking up trace nuttiness from browning on the griddle.
Cooking Remarks
Flour tortillas may be flat, but they are still bread . . . bread that is laden with fat (our formula uses avocado oil, though leaf lard is customary). And like most breads, the dough for flour tortillas gets its strength and extensibility from the gluten that’s developed during mixing. The paradox, however, is that fat in any form is a gluten inhibitor within a dough matrix.
To resolve this conflict, we devised a two-stage mixing method for the tortilla dough. First we mix flour with water, forming a well-hydrated dough, then we give the dough a hand-knead to work up the gluten, followed by a brief rest. For the second stage, the dough goes into the bowl of a stand mixer along with the avocado oil (and salt, another gluten inhibitor), leaving the mixer with the unenviable task of incorporating the two. The finished dough can be stretched to the point of translucence, and the end result are flour tortillas with a satisfying chew but that are wonderfully lightly and supple.
If the dough feels under-hydrated, feel free to sprinkle a few drops of water lightly from your fingertips and give it a light knead. If the dough becomes over-hydrated, however, rolling it out will be very challenging. We recommend little or no additional bench flour for the rolling process.
equipment mise en place
For this recipe, you will need a digital kitchen scale; a teakettle; a digital instant-read thermometer; a large bowl; a medium bowl; a stand mixer fitted with the flat-beater attachment; a metal bench knife or a chef’s knife; a heavy square or round griddle, at least 10 inches in size, preferably well-seasoned cast-iron; a pair of scissors; a gallon-size zipper-lock freezer bag; a narrow French rolling pin; a ruler; a small offset spatula; and a clean kitchen towel.
-
-
Spring or filtered water
-
380
-
190
-
110grams avocado oil
-
10grams fine sea salt
-
-
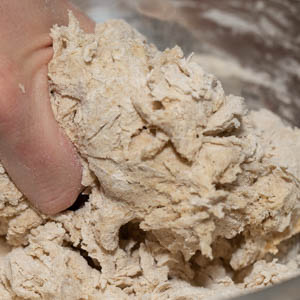
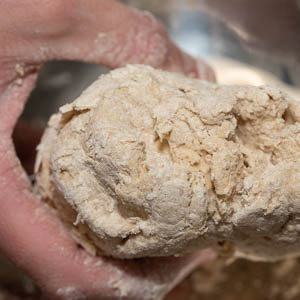
Fill a teakettle with water and warm it to 120 degrees. Pour 290 grams of the water into a large bowl, then add both flours. Work the ingredients together by squeezing with your dominant hand until the flour begins to hydrate and a shaggy dough forms (fig. 1.1). The mixture will be very stiff and will take time to hydrate completely. Keep squeezing until the dough starts to come together into a ball (fig. 1.2). Grasp the ball and use it to wipe the sides of the bowl. Turn the dough and any remaining flour onto a clean work surface and knead the until the dough shows no dry bits of flour and is completely smooth, about 3 minutes (fig. 1.3). Place the dough in a clean medium bowl, cover tightly with plastic wrap, and let rest for 20 minutes.
-
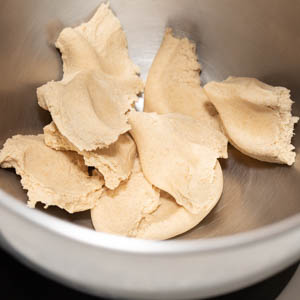
Break the dough into rough 1½-inch pieces and drop them into the bowl of a stand mixer (fig. 2.1). Add the avocado oil and salt, then attach the bowl and the flat-beater attachment to the mixer. Mix on low speed until the oil is fully incorporated and the dough is a nice, neat cohesive mass, 3 to 5 minutes.
-
Turn the dough onto a clean work surface. Knead it by hand, without adding additional flour, for about 3 minutes. Break off a 2-inch piece and, holding it aloft with both your hands, gradually stretch it to a thin membrane. If the dough is adequately kneaded, it will stretch until translucent (fig. 3.1), and when it tears, it should do so cleanly. If the dough does not meet these criteria, continue to knead it and retest until it does. Place the dough in a clean medium bowl, cover tightly with plastic wrap, and let rest for 20 minutes.
-
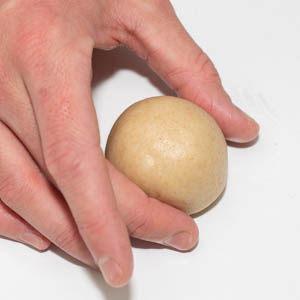
Uncover the bowl, invert it onto a clean work surface, and allow the dough to drop out. Using a metal bench knife or a chef’s knife, divide the dough into 75-gram pieces; you will have 12 to 13. Cover the pieces with plastic wrap to prevent drying. One at a time, with the palm of your hand, lightly roll each portion against the work surface into a ball (fig. 4.1); aim for a taut surface and sealed bottom, but perfection isn’t crucial. As they are formed, place the balls back under the plastic wrap. Let rest for at least 20 minutes or for up to 1 hour.
-
Set a heavy 10-inch square or round griddle, preferably well-seasoned cast iron, over medium heat and let it heat while you shape the tortillas. (By the time you are ready to cook the tortillas the griddle should be hot enough that you cannot hold your hand 2 inches above its surface for 10 seconds without the heat becoming uncomfortable.) Using scissors, remove the top of a gallon-sized zipper-lock freezer bag, cutting just below the zipper-lock seal. Snip along the two side seams and the bottom, creating two squares of plastic.
-
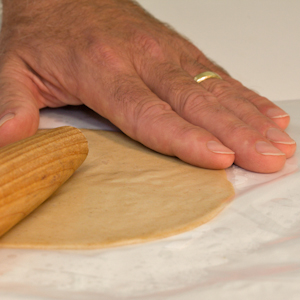
Place a dough ball between the 2 sheets of plastic and flatten it slightly with the palm of your hand. Position the tapered end of a French rolling pin in the center of the dough. Holding the end of the rolling pin in position at the center of the dough with one hand (fig. 6.1), roll away from you, pivoting from the center of the dough, until the rolling pin is about 45 degrees from the starting point. Rotate the plastic sheath clockwise about one-quarter turn and continue rolling and rotating until the dough is 8 to 9 inches in diameter. If you roll the tortilla too thinly in places, use a small offset spatula to smooth and even it out through the plastic.
-
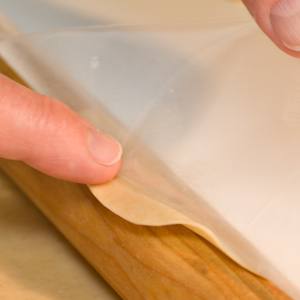
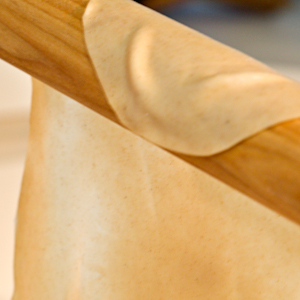
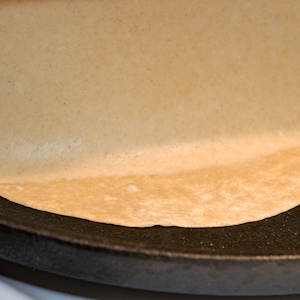
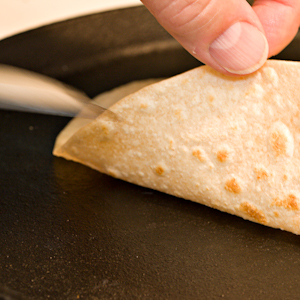
Peel off the top layer of plastic, then drape it back lightly over the dough. Flip the entire package so the bottom sheet of plastic becomes the top and peel off the top layer of plastic. Lightly coat the griddle with nonstick cooking spray, then blot the excess with paper towels. Position the rolling pin across the top third of the tortilla and use the bottom plastic to drape the dough up onto the pin (fig. 7.1). Gently peel the dough off the plastic, allowing it to drop onto the rolling pin (fig. 7.2), then, using the rolling pin, lift the tortilla off its plastic backing. Lower the tortilla onto the griddle, near the edge to make sure the entire tortilla will fit; let the tortilla grip the griddle upon first contact (fig. 7.3). Unfurl the tortilla across the griddle. If necessary, use the tip of a small offset spatula to pull the dough gently into shape. (If the tortilla is hopelessly wrinkled, simply let it cook.) After about 15 seconds, check the bottom of the tortilla for browning (fig. 7.4). If it is spotty golden brown, flip the tortilla, pressing to smooth the round if needed. The surface should have appealing brown spots and blisters. Cook until the second side is spotty brown, about 10 seconds; you may now flip the tortilla at will to cook and brown it further, though tortillas destined for quesadillas or other applications where they’ll see heat again should be kept supple and not allowed to become crisp.
-
Transfer the tortilla to a clean kitchen towel, folding the towel over the tortilla to keep it supple. Roll out and cook the remaining tortillas, stacking them directly on top of each other. If you will not be using the tortillas in the next hour or so, let cool to room temperature, transfer them from the towel to a gallon-size zipper-lock bag, and refrigerate for up to 3 days. To reheat and serve the tortillas as accompaniment to grilled chicken or steak, warm them for a few seconds on each side on a medium-hot griddle.
-
-
1.1
-
1.2
-
1.3

-
-
-
2.1
-
-
-
3.1

-
-
-
4.1
-
-
-
6.1
-
-
-
7.1
-
7.2
-
7.3
-
7.4
-