Naturally Leavened Pizza Dough
introduction
Take extraordinary organic heirloom flour, toss commercial yeast isolate aside in favor of a bubbly wild levain (named Trixie, in case you’re wondering), task a home oven to its limits, and the seductions of pizza go from irresistible to addictive. We asked bread baker Henry Jones to develop such a pizza. One that relied solely on wild fermentation but performed like a commercial yeast–raised dough. One with a fluffy outer band of crust that charred and blistered into a leopard print. One with a bottom crust that was thin but not floppy. And one that could be produced with a basic home oven. Yes, this dough requires many hours of fermentation. But the reward is home-baked pizza unlike any you’ve made before.
Baking Notes
If you adhere to the recipe’s timing, you’ll be baking pizzas for lunch on the fourth day. But if you want pizza for dinner instead, the dough will not suffer from waiting until the evening. In fact, we’ve baked pies a full 24 hours after dividing the dough with fine results (though the extended fermentation makes the dough a little more difficult to shape and a touch tangier in taste). This recipe yields three rounds, so if you’d like only two pizzas midday on day four, you can leave the third round of dough in the fridge and bake off a fresh pie for lunch the following day.
Although this recipe is for only dough and not finished pizza with toppings, it includes instructions for heating a pizza steel or stone because the steel must gather heat for at least 1 hour before baking. For dough-shaping and baking instructions, see our recipe for Pizza with Garlic Confit and Wilted Greens . . . which also happens to be our favorite way to use this dough.
equipment mise en place
For this recipe, you will need a digital kitchen scale; a digital instant-read thermometer; a small saucepan; a pint-size mason jar; a small silicone spatula; small and medium bowls (ideally made of heavy ceramic); a plastic bowl scraper; a metal bench knife; a 9 by 13-inch cake pan (or similarly shaped and sized vessel with relatively high sidewalls, or better yet, a small plastic pizza proofing box); and a pizza steel or stone.
-
for refreshing the levain:
-
25grams spring or filtered water
-
10grams Red Fife Natural Levain
-
25grams Anson Mills Pizza Maker’s Flour, freezer-cold (about 5 degrees)
-
-
for feeding the final levain:
-
25grams spring or filtered water
-
25grams refreshed levain
-
25grams Anson Mills Pizza Maker’s Flour, room temperature
-
-
for the autolyse:
-
380grams Anson Mills Pizza Maker’s Flour, room temperature
-
225grams spring or filtered water
-
-
for the final dough:
-
60grams final levain
-
25grams spring or filtered water
-
10grams fine sea salt
-
-
for pre-shaping:
-
Anson Mills Pizza Maker’s Flour, for dusting
-
Extra-virgin olive oil, for brushing the pan
-
-
Day 1, 10:00 p.m.—refresh your levain: In a small saucepan, warm the water to 105 degrees. Pour the water into a pint-size mason jar, add the levain, and stir with a small silicone spatula until dissolved. Add the flour and mix thoroughly. Scrape down the sides of the container and cover, loosely tightening the metal band. Let stand overnight at room temperature.
-
Day 2, 8:00 a.m.—feed the final levain: In a small saucepan, warm the water to 90 degrees. Pour it into a medium bowl, add 25 grams of the refreshed levain, and stir until well combined. Add the flour and mix until no dry bits remain and the mixture is homogenous. Cover the bowl with plastic wrap and place in a warm area, a spot where the final levain will maintain an internal temperature of about 80 degrees.
-
Day 2, 11:00 a.m. —mix the autolyse: In a small saucepan, warm the water to 90 degrees. Pour it into a medium bowl (ideally one made of heavy ceramic, though metal will work, too), then add the flour. Incorporate by squeezing and kneading with your dominant hand while rotating the bowl until the flour is hydrated completely and has gained a little strength; occasionally scrape down the bowl, and your hand, with a plastic bowl scraper. Cover with plastic wrap and place the bowl next to the one containing the final levain.
-
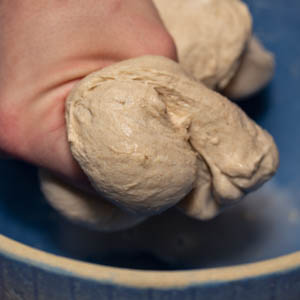
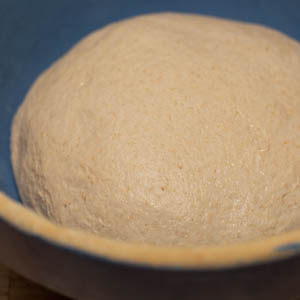
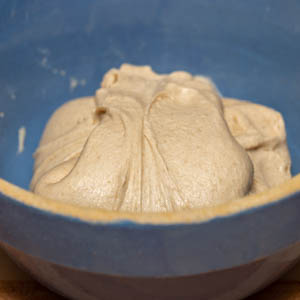
Day 2, 11:30 a.m. —mix the final dough: At this point, the final levain will have nearly tripled in size and appear very puffy and active. Add the 60 grams final levain (reserve the remainder for future levain feedings), the 25 grams warm water, and salt to the autolyse and squeeze with your hand (fig. 4.1), forcing everything to combine into a dough. Initially the mixture will look ruined, but after a few minutes it will come together into a single mass. Lightly knead the dough in the bowl until it gains a little strength and starts to look smooth (fig. 4.2), 2 to 3 minutes.
-
Day 2, 11:35 a.m. —bulk fermentation: If the sides of the bowl are mucky, scrape them clean with a plastic bowl scraper. Cover tightly with plastic wrap and place in a warm area, one where the dough will maintain an internal temperature of about 80 degrees. Let the dough rest for 1 hour.
-
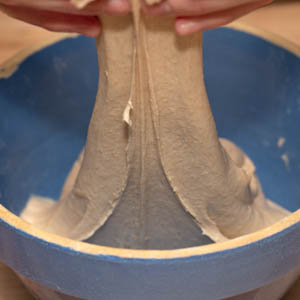
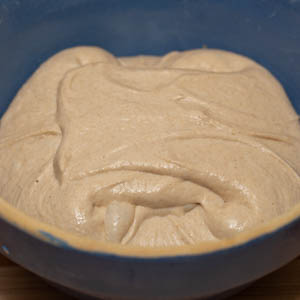
Moisten your dominant hand with water and insert it down the side of the bowl at the 12 o’clock position, then stretch and fold the dough down to the opposite side of the bowl (fig. 6.1). Rotate the bowl 180 degrees and stretch and fold the dough in the same way. Now rotate the bowl 90 degrees in the same direction and fold, then rotate the bowl 180 degrees in the same direction and fold; always rotate the bowl in the same direction. You will have given the dough a total of 4 folds (fig. 6.2). Cover the bowl with plastic wrap and let the dough rest in a warm area for 1 hour. Perform three more sets of stretching and folding with a 1-hour rest between each set. Bulk fermentation will take a total of 4 hours. Once the 4 hours has elapsed, the dough will have increased about 30 percent in volume but will not appear extremely active (fig 6.3). Cover the bowl with a kitchen towel then plastic wrap and refrigerate overnight.
-
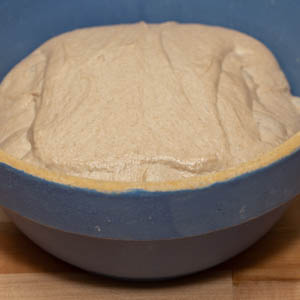
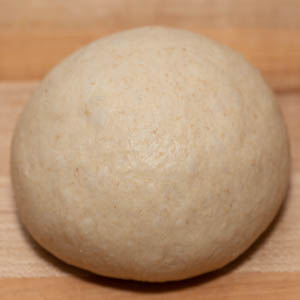
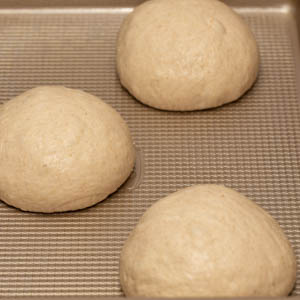
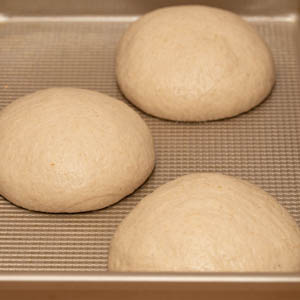
Day 3, 10:00 a.m.— pre-shape and refrigerate for final fermentation: Remove the dough from the refrigerator; it will feel puffier and have increased slightly in volume but won’t look significantly different from the night before (fig. 7.1). Lightly dust the dough with flour, scrape it onto a lightly floured countertop, and dust with more flour. Divide the mass into three equal pieces, each about 230 grams. Round the pieces into tight spheres and set aside (fig 7.2). Brush the inside of a 9 by 13-inch cake pan (or a similarly shaped and sized vessel, with relatively high sidewalls, or, better yet, a small plastic pizza proofing box) with about 1 teaspoon of olive oil. Place the dough rounds into this pan, spacing them evenly apart (fig. 7.3). Wrap the pan with plastic wrap and place in a warm area for 1 hour. The rounds will relax, gain a little height, and small bubbles will appear on the surface (fig. 7.4). Now place the pan in the refrigerator and let the dough ferment for at least 12 hours or up to 24 hours.
-
Day 4, 11:00 a.m.— prepare to bake: Adjust the oven rack to the upper-middle position and place a baking steel or stone on the rack. Heat the oven as high as it will go, 500 or 550 degrees, and allow the steel to heat for at least 1 hour.
-
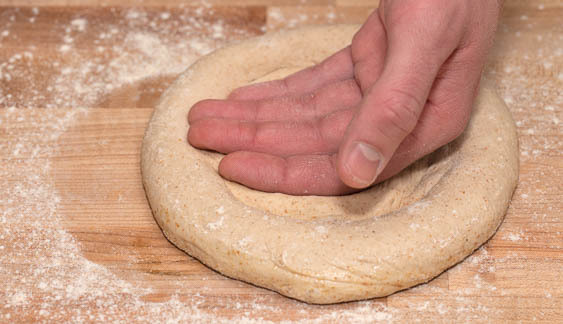
Day 4, 11:30 a.m.— final shape and bake: Remove the dough rounds from the refrigerator and let stand at room temperature, covered, for at least 30 minutes or up to 1½ hours. The dough is now ready to use.
-
-
4.1
-
4.2
-
-
-
6.1
-
6.2
-
6.3
-
-
-
7.1
-
7.2
-
7.3
-
7.4
-
recipe developed by Henry Jones